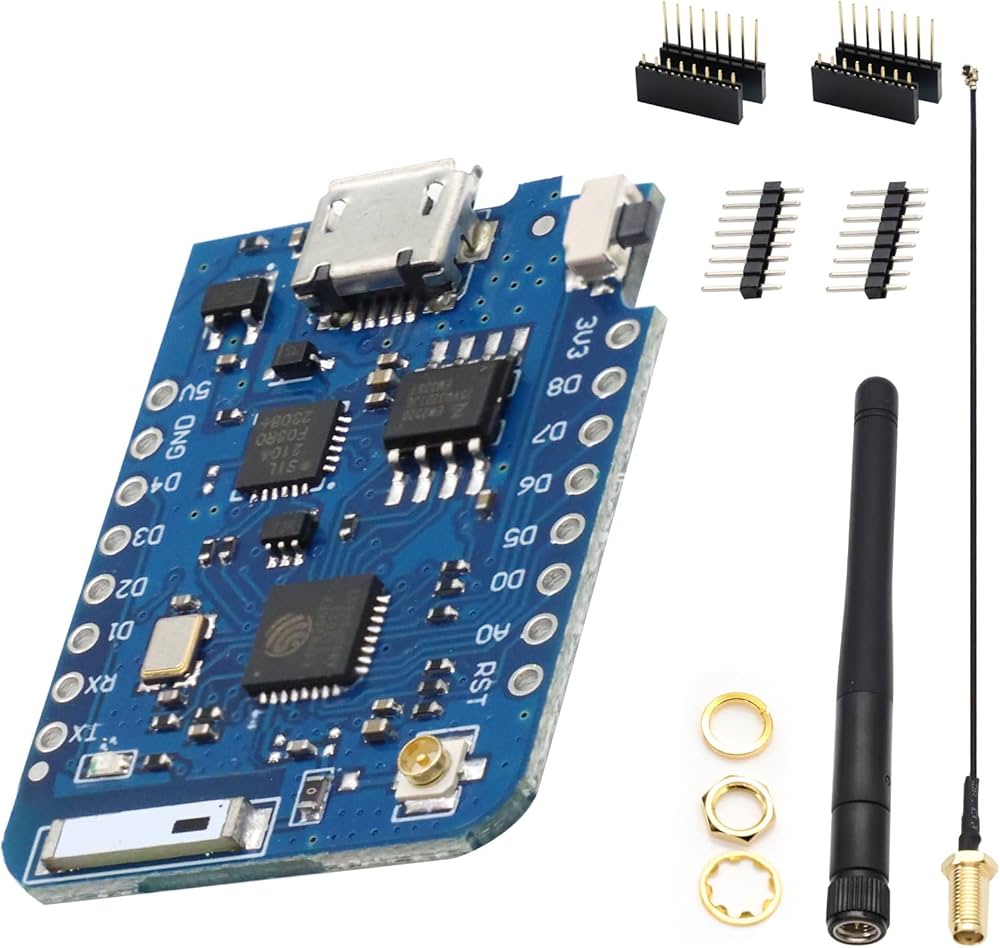
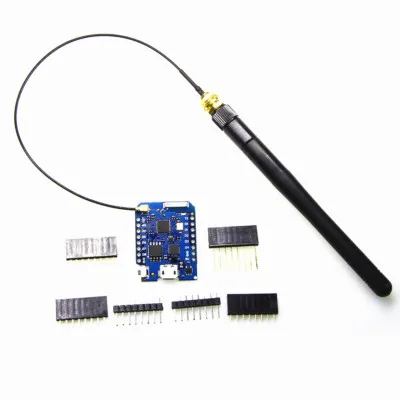
Features:
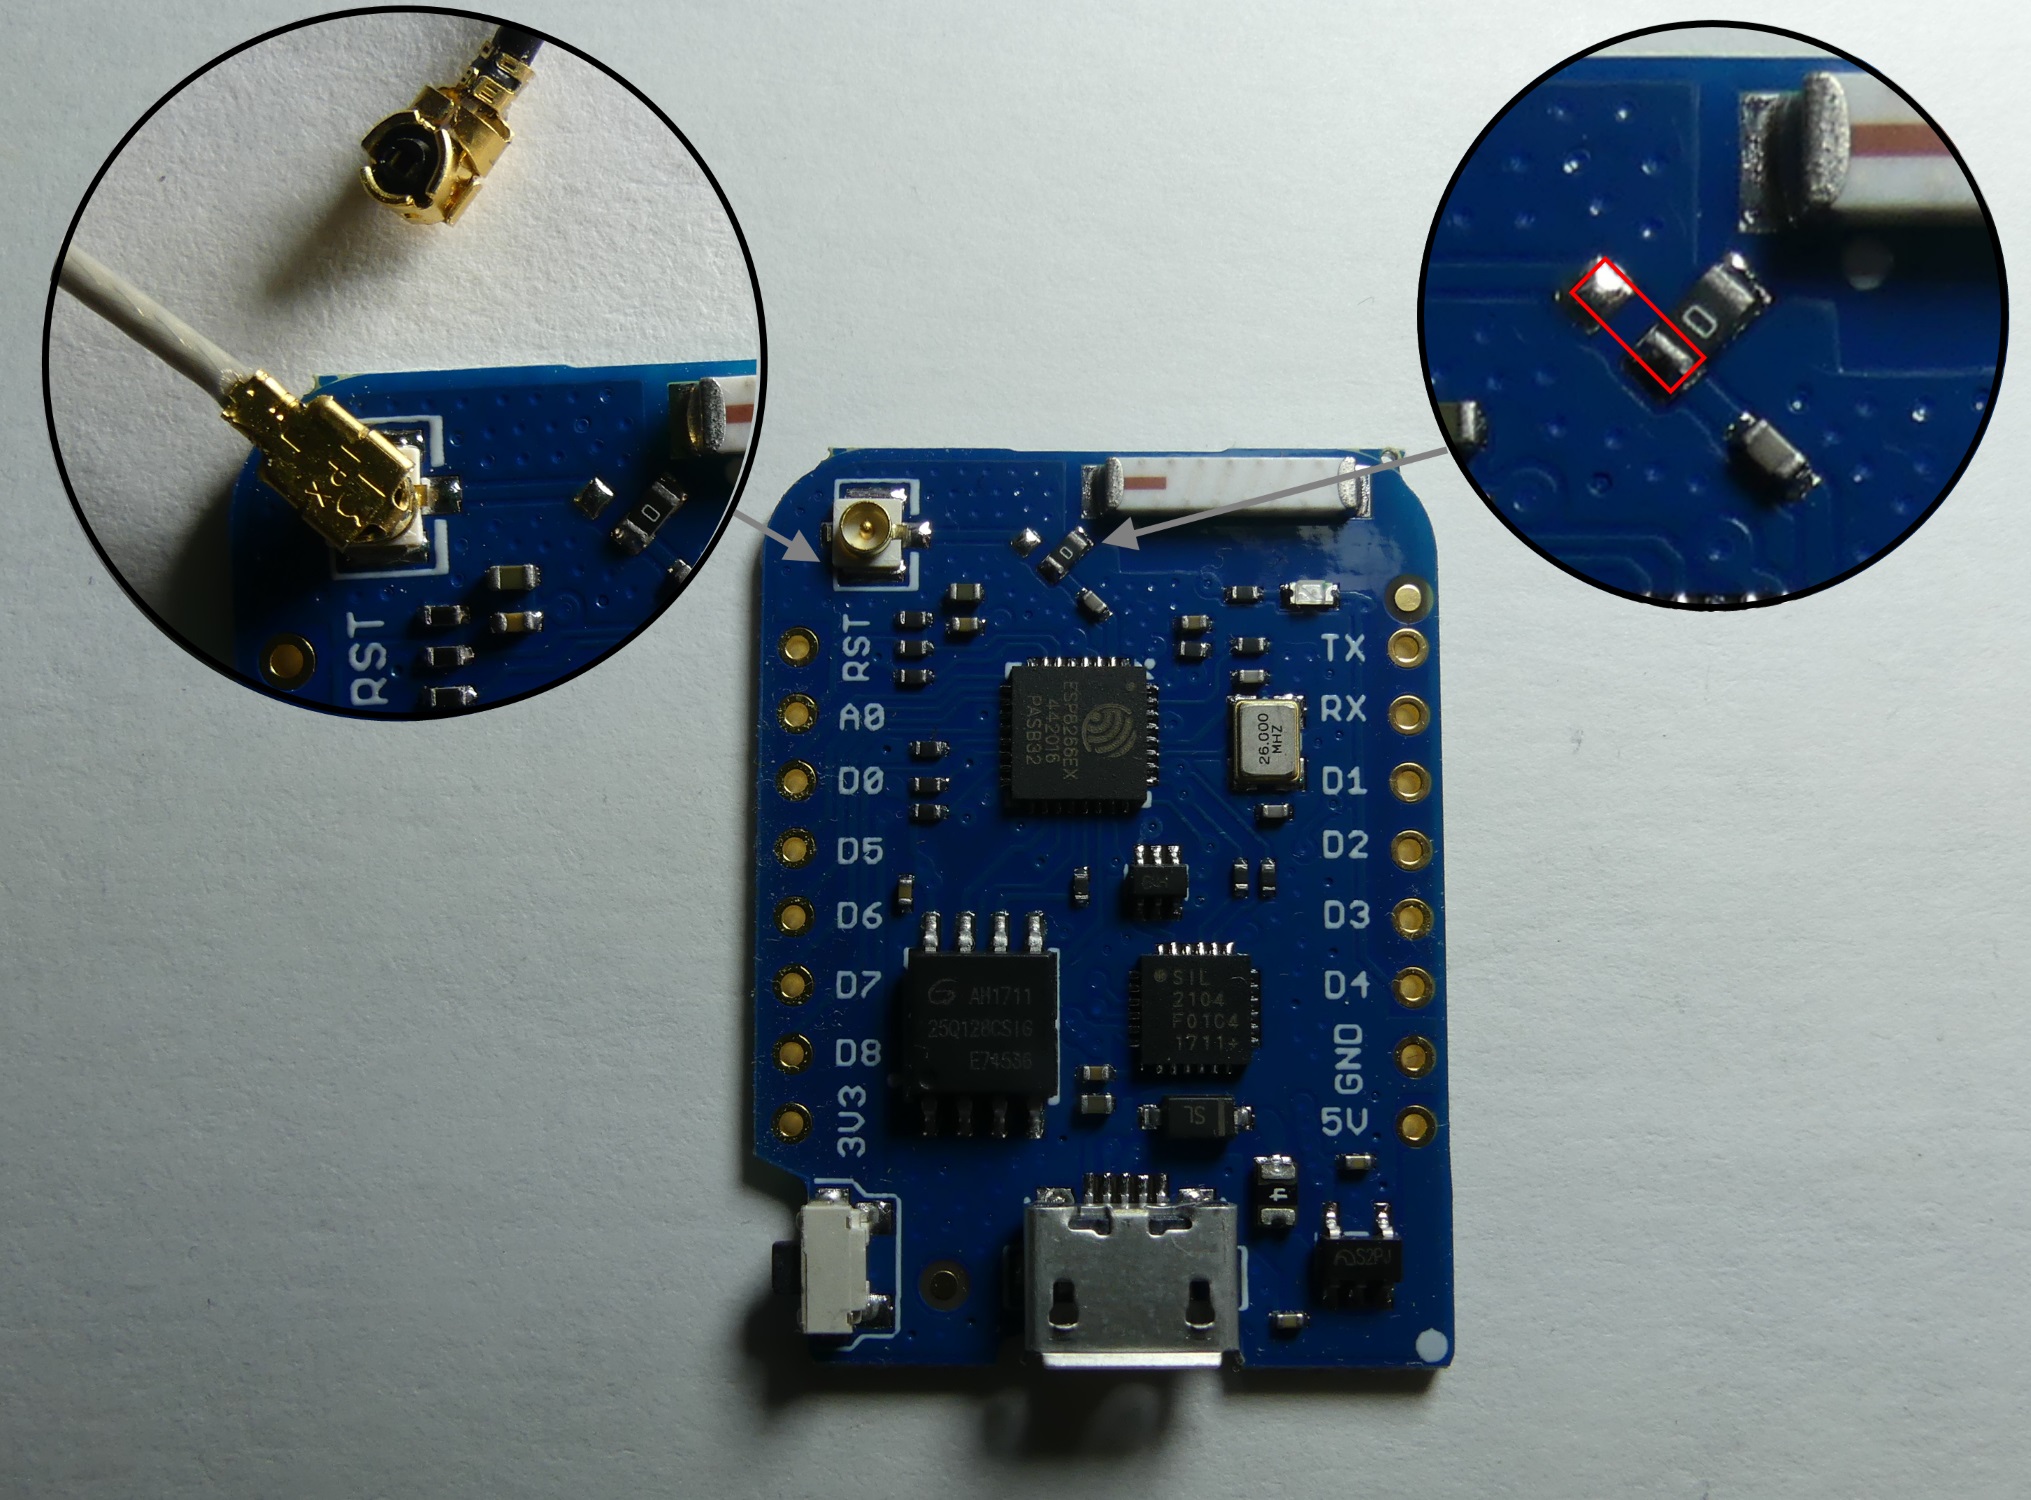
- ESP8266EX Microcontroller with 32-bit architecture.
- Wi-Fi Connectivity with full TCP/IP stack support.
- High Clock Speed: 80MHz / 160MHz.
- Large Flash Memory: 16MB for program storage.
- Compact and Lightweight Design.
- 11 Digital GPIO Pins and 1 Analog Input.
- Supports OTA (Over-The-Air) updates.
- Compatible with Arduino IDE, MicroPython, and NodeMCU.
- USB to Serial Interface via CP2104.
- External Antenna Support for extended range.
- Wide range of compatible shields and modules.
Principle of Work:
The D1 Mini Pro operates by executing firmware stored in its flash memory while utilizing its integrated Wi-Fi module to communicate with networks and other devices.
- Processing: ESP8266EX CPU handles logic and data processing.
- Connectivity: Built-in Wi-Fi enables communication with cloud services and devices.
- Peripheral Control: GPIO pins interface with sensors, displays, and actuators.
- OTA Updates: Firmware can be updated wirelessly without physical connection.
Pinout of the Module:

| Pin | Function | ESP8266 Pin |
|---|---|---|
| RX | UART Receive | RXD |
| A0 | Analog Input (Max 3.2V) | A0 |
| D0 | GPIO | GPIO16 |
| D1 | I2C SCL | GPIO5 |
| D2 | I2C SDA | GPIO4 |
| D3 | GPIO (Pull-up) | GPIO0 |
| D4 | GPIO / LED | GPIO2 |
| D5 | SPI SCK | GPIO14 |
| D6 | SPI MISO | GPIO12 |
| D7 | SPI MOSI | GPIO13 |
| D8 | SPI SS | GPIO15 |
| G | Ground | GND |
| 5V | Power Input | - |
| 3V3 | 3.3V Output | 3.3V |
| RST | Reset | RST |
Applications:
- IoT projects and smart devices.
- Home automation systems.
- Wireless sensor networks.
- Remote monitoring systems.
- Embedded control applications.
First Time Starting:
- Connect the board to your PC using a Micro USB cable.
- Install the CP2104 USB driver if required.
- Open Arduino IDE.
- Add ESP8266 boards via Board Manager URL.
- Select board: LOLIN(WEMOS) D1 R2 & mini.
- Select the correct COM port.
- Upload a test sketch such as Blink.
Code:
Basic LED Blink Example:
void setup() {
  pinMode(LED_BUILTIN, OUTPUT);
}

void loop() {
  digitalWrite(LED_BUILTIN, LOW);
  delay(1000);
  digitalWrite(LED_BUILTIN, HIGH);
  delay(1000);
}
Technical Details:
- Microcontroller: ESP8266EX
- Operating Voltage: 3.3V
- Input Voltage: 5V (USB)
- Digital I/O Pins: 11
- Analog Input: 1 (Max 3.2V)
- Flash Memory: 16MB
- Clock Speed: 80MHz / 160MHz
- USB Interface: CP2104
- Dimensions: 34.2mm x 25.6mm
- Weight: 2.5g
- Current Consumption: ~70mA (normal), ~0.31mA (sleep)
Features:
- ESP8266EX Microcontroller with 32-bit architecture.
- Wi-Fi Connectivity with full TCP/IP stack support.
- High Clock Speed: 80MHz / 160MHz.
- Large Flash Memory: 16MB for program storage.
- Compact and Lightweight Design.
- 11 Digital GPIO Pins and 1 Analog Input.
- Supports OTA (Over-The-Air) updates.
- Compatible with Arduino IDE, MicroPython, and NodeMCU.
- USB to Serial Interface via CP2104.
- External Antenna Support for extended range.
- Wide range of compatible shields and modules.
Principle of Work:
The D1 Mini Pro operates by executing firmware stored in its flash memory while utilizing its integrated Wi-Fi module to communicate with networks and other devices.
- Processing: ESP8266EX CPU handles logic and data processing.
- Connectivity: Built-in Wi-Fi enables communication with cloud services and devices.
- Peripheral Control: GPIO pins interface with sensors, displays, and actuators.
- OTA Updates: Firmware can be updated wirelessly without physical connection.
Pinout of the Module:
| Pin | Function | ESP8266 Pin |
|---|---|---|
| RX | UART Receive | RXD |
| A0 | Analog Input (Max 3.2V) | A0 |
| D0 | GPIO | GPIO16 |
| D1 | I2C SCL | GPIO5 |
| D2 | I2C SDA | GPIO4 |
| D3 | GPIO (Pull-up) | GPIO0 |
| D4 | GPIO / LED | GPIO2 |
| D5 | SPI SCK | GPIO14 |
| D6 | SPI MISO | GPIO12 |
| D7 | SPI MOSI | GPIO13 |
| D8 | SPI SS | GPIO15 |
| G | Ground | GND |
| 5V | Power Input | - |
| 3V3 | 3.3V Output | 3.3V |
| RST | Reset | RST |
Applications:
- IoT projects and smart devices.
- Home automation systems.
- Wireless sensor networks.
- Remote monitoring systems.
- Embedded control applications.
First Time Starting:
- Connect the board to your PC using a Micro USB cable.
- Install the CP2104 USB driver if required.
- Open Arduino IDE.
- Add ESP8266 boards via Board Manager URL.
- Select board: LOLIN(WEMOS) D1 R2 & mini.
- Select the correct COM port.
- Upload a test sketch such as Blink.
Code:
Basic LED Blink Example:
void setup() {
  pinMode(LED_BUILTIN, OUTPUT);
}

void loop() {
  digitalWrite(LED_BUILTIN, LOW);
  delay(1000);
  digitalWrite(LED_BUILTIN, HIGH);
  delay(1000);
}
Technical Details:
- Microcontroller: ESP8266EX
- Operating Voltage: 3.3V
- Input Voltage: 5V (USB)
- Digital I/O Pins: 11
- Analog Input: 1 (Max 3.2V)
- Flash Memory: 16MB
- Clock Speed: 80MHz / 160MHz
- USB Interface: CP2104
- Dimensions: 34.2mm x 25.6mm
- Weight: 2.5g
- Current Consumption: ~70mA (normal), ~0.31mA (sleep)