How to Install:
Step 1: Insert the Servo
- Insert the servo into one side of the pan bracket.
- Ensure that the servo shaft is on the opposite side from the pivot point for the tilt bracket.

Step 2: Assemble Pan Bracket
Assemble the second side of the pan bracket to enclose the servo.

Step 3: Attach Pan Bracket Halves
Attach the two halves of the pan bracket using two screws as shown.

Step 4: Attach Servo Horn
Attach the 4-armed servo horn to the servo shaft using one of the short screws as shown.

Installation Tips:
- Use one of the shorter screws to attach the base to the servo shaft. The longer mounting screws packed with some servos may damage the servo if screwed in too far.

Step 5: Mount the Servo
- Mount the servo so that the shaft aligns with the pivot hole.
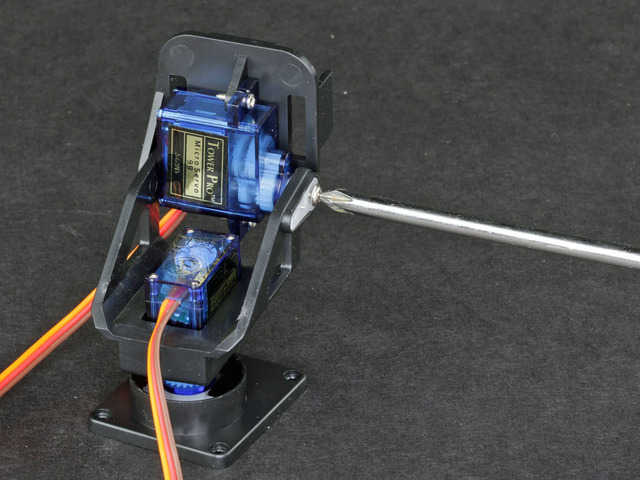
- Attach with the two screws as shown.

Step 6: Attach Single-Armed Servo Horn
Fit the single-armed servo horn into the recess in the pan-base and attach it with one of the smallest screws.
Assembly Notes:
- Make sure that the tilt bracket can move through the full 180 degrees of servo motion. If not, detach it from the servo horn, rotate, and re-install.

Step 7: Complete the Assembly
Complete the assembly by securing the horn to the shaft with a short screw.

Step 8: Leftover Parts
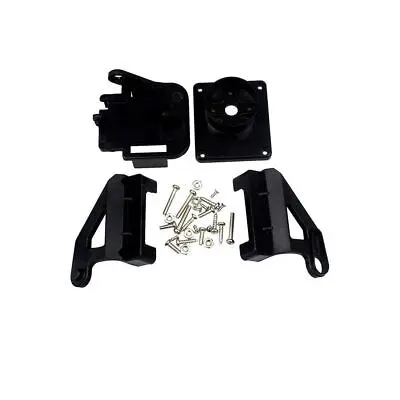
When you finish assembling the kit, you will have several machine screws, nuts, and threaded inserts leftover. These can be used to attach the base to your project or saved in your parts bin for future projects.

How to Install:
Step 1: Insert the Servo
- Insert the servo into one side of the pan bracket.
- Ensure that the servo shaft is on the opposite side from the pivot point for the tilt bracket.

Step 2: Assemble Pan Bracket
Assemble the second side of the pan bracket to enclose the servo.

Step 3: Attach Pan Bracket Halves
Attach the two halves of the pan bracket using two screws as shown.

Step 4: Attach Servo Horn
Attach the 4-armed servo horn to the servo shaft using one of the short screws as shown.

Installation Tips:
- Use one of the shorter screws to attach the base to the servo shaft. The longer mounting screws packed with some servos may damage the servo if screwed in too far.

Step 5: Mount the Servo
- Mount the servo so that the shaft aligns with the pivot hole.
- Attach with the two screws as shown.

Step 6: Attach Single-Armed Servo Horn
Fit the single-armed servo horn into the recess in the pan-base and attach it with one of the smallest screws.
Assembly Notes:
- Make sure that the tilt bracket can move through the full 180 degrees of servo motion. If not, detach it from the servo horn, rotate, and re-install.

Step 7: Complete the Assembly
Complete the assembly by securing the horn to the shaft with a short screw.

Step 8: Leftover Parts
When you finish assembling the kit, you will have several machine screws, nuts, and threaded inserts leftover. These can be used to attach the base to your project or saved in your parts bin for future projects.


