

Features
- Dual L293D Drivers: Two onboard L293D motor driver chips.
- Four H-Bridges: Control up to 4 DC motors or 2 stepper motors.
- Drive Current: 0.6A per channel (1.2A peak).
- Motor Voltage Range: 4.5VDC – 16VDC.
- Speed Control: Independent 8-bit PWM (256 levels).
- Protection: Thermal shutdown and back-EMF protection diodes.
- Safe Power-Up: Pull-down resistors prevent unwanted motor movement.
- Servo Connectors: Dedicated headers for 2 hobby servos.
- Convenient Terminals: Screw terminals for motors and external power.
Specifications
- Motor Driver IC: L293D
- Current Rating: 0.6A per channel (1.2A peak)
- Motor Supply Voltage: 4.5V – 16V DC
- Motor Support: 4 DC motors / 2 Stepper motors
- Speed Resolution: 8-bit PWM
- Servo Outputs: 2 × 5V hobby servo connectors
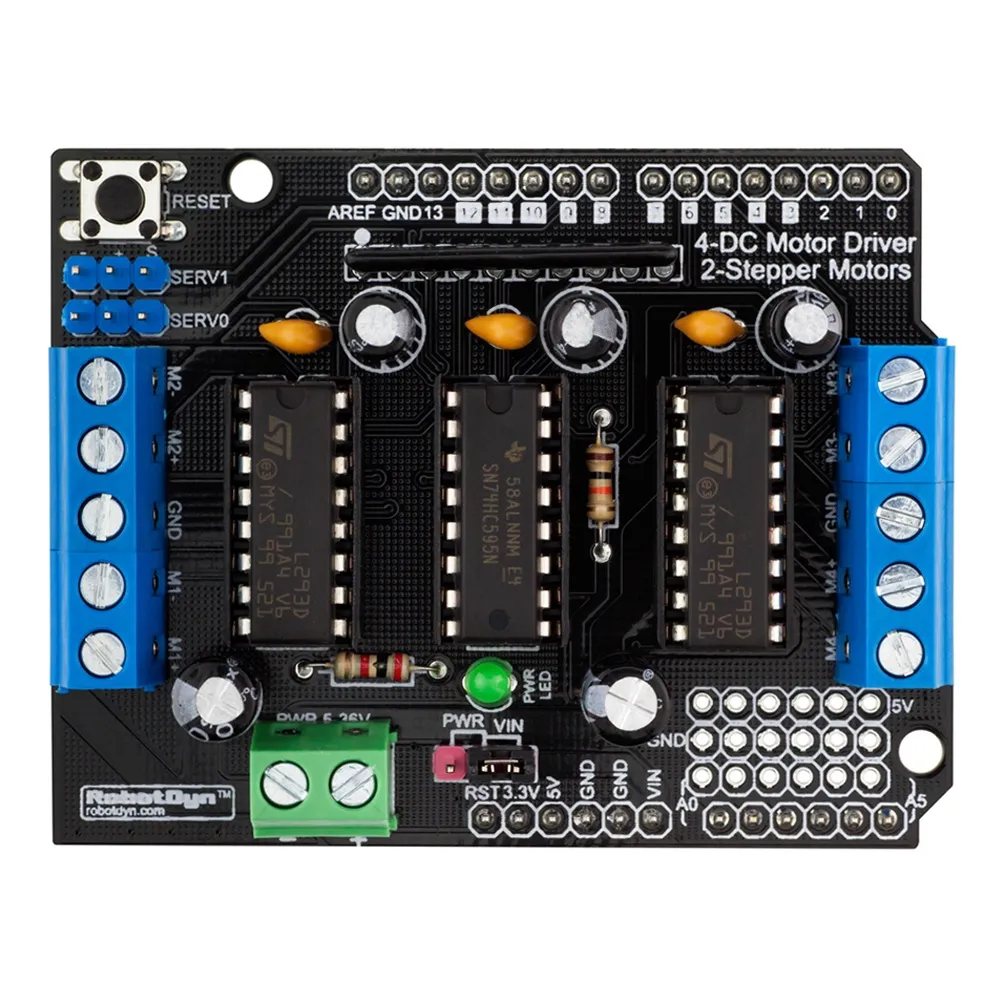
Pinout / Connections

- M1 – M4: DC motor outputs
- Stepper Ports: Stepper motor outputs
- Servo 1 / Servo 2: Servo signal connectors
- EXT_PWR: External motor power input
- GND: Ground connection
Arduino Wiring
No logic wiring is required. Simply mount the shield directly onto the Arduino board. Connect motors and power supply only.
Arduino Library
- Install the AFMotor library (Adafruit Motor Shield Library):
https://github.com/adafruit/Adafruit-Motor-Shield-library
Library Installation
- Open Arduino IDE → Sketch → Include Library → Manage Libraries.
- Search for Adafruit Motor Shield.
- Click Install.
Example Arduino Code (DC Motor)
#include "AFMotor.h"

AF_DCMotor motor(1);  // Motor connected to M1

void setup() {
  motor.setSpeed(200);   // Speed range: 0 - 255
  motor.run(RELEASE);    // Ensure motor is stopped
}

void loop() {
  motor.run(FORWARD);
  delay(2000);

  motor.run(BACKWARD);
  delay(2000);

  motor.run(RELEASE);
  delay(1000);
}
Example Arduino Code (Stepper Motor)
#include "AFMotor.h"

AF_Stepper stepper(200, 2);  // 200 steps per revolution, connected to M3/M4

void setup() {
  stepper.setSpeed(60);  // RPM
}

void loop() {
  stepper.step(100, FORWARD, SINGLE);
  delay(500);

  stepper.step(100, BACKWARD, SINGLE);
  delay(500);
}
Power Notes
- Always use an external power supply for motors.
- Match supply voltage with motor ratings.
- Avoid powering motors from Arduino 5V.
- Verify polarity before applying power.
Applications
- Robotics projects
- Motor control experiments
- Automation systems
- DIY embedded projects
Tips & Information
- Motors may generate electrical noise — decoupling capacitors are recommended.
- Provide sufficient ventilation under heavy load.
- Do not exceed continuous current ratings.
- Suitable for small to medium-sized motors.
Features
- Dual L293D Drivers: Two onboard L293D motor driver chips.
- Four H-Bridges: Control up to 4 DC motors or 2 stepper motors.
- Drive Current: 0.6A per channel (1.2A peak).
- Motor Voltage Range: 4.5VDC – 16VDC.
- Speed Control: Independent 8-bit PWM (256 levels).
- Protection: Thermal shutdown and back-EMF protection diodes.
- Safe Power-Up: Pull-down resistors prevent unwanted motor movement.
- Servo Connectors: Dedicated headers for 2 hobby servos.
- Convenient Terminals: Screw terminals for motors and external power.
Specifications
- Motor Driver IC: L293D
- Current Rating: 0.6A per channel (1.2A peak)
- Motor Supply Voltage: 4.5V – 16V DC
- Motor Support: 4 DC motors / 2 Stepper motors
- Speed Resolution: 8-bit PWM
- Servo Outputs: 2 × 5V hobby servo connectors
Pinout / Connections
- M1 – M4: DC motor outputs
- Stepper Ports: Stepper motor outputs
- Servo 1 / Servo 2: Servo signal connectors
- EXT_PWR: External motor power input
- GND: Ground connection
Arduino Wiring
No logic wiring is required. Simply mount the shield directly onto the Arduino board. Connect motors and power supply only.
Arduino Library
- Install the AFMotor library (Adafruit Motor Shield Library):
https://github.com/adafruit/Adafruit-Motor-Shield-library
Library Installation
- Open Arduino IDE → Sketch → Include Library → Manage Libraries.
- Search for Adafruit Motor Shield.
- Click Install.
Example Arduino Code (DC Motor)
#include "AFMotor.h"

AF_DCMotor motor(1);  // Motor connected to M1

void setup() {
  motor.setSpeed(200);   // Speed range: 0 - 255
  motor.run(RELEASE);    // Ensure motor is stopped
}

void loop() {
  motor.run(FORWARD);
  delay(2000);

  motor.run(BACKWARD);
  delay(2000);

  motor.run(RELEASE);
  delay(1000);
}
Example Arduino Code (Stepper Motor)
#include "AFMotor.h"

AF_Stepper stepper(200, 2);  // 200 steps per revolution, connected to M3/M4

void setup() {
  stepper.setSpeed(60);  // RPM
}

void loop() {
  stepper.step(100, FORWARD, SINGLE);
  delay(500);

  stepper.step(100, BACKWARD, SINGLE);
  delay(500);
}
Power Notes
- Always use an external power supply for motors.
- Match supply voltage with motor ratings.
- Avoid powering motors from Arduino 5V.
- Verify polarity before applying power.
Applications
- Robotics projects
- Motor control experiments
- Automation systems
- DIY embedded projects
Tips & Information
- Motors may generate electrical noise — decoupling capacitors are recommended.
- Provide sufficient ventilation under heavy load.
- Do not exceed continuous current ratings.
- Suitable for small to medium-sized motors.