Skip to Content

ESP8266 WIFI D1 MINI Dev. Board, USB CP2104 (32Mb flash) RobotDYN

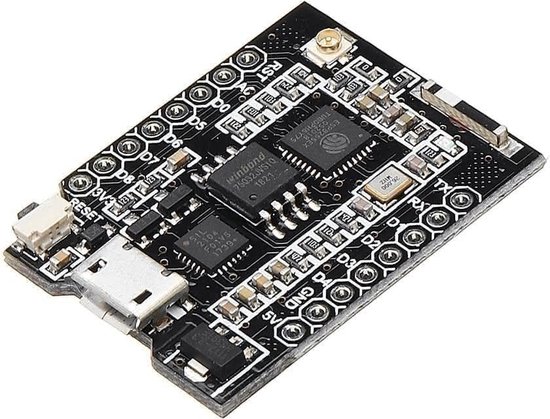
The WiFi D1 Mini PRO is a compact ESP8266-based development board designed for wireless IoT applications. It features 32Mb flash memory and uses the CP2104 USB-to-TTL interface for programming and communication. The board is fully pin-compatible with WeMos D1 Mini and D1 Mini PRO layouts, allowing easy integration with existing shields and tutorials.

Package Includes

  • 1 × WiFi D1 Mini PRO (32Mb Flash)
  • 2 × Male Pin Header 1×8 pins
  • 2 × Female Pin Header 1×8 pins (Black)
  • 2 × Stackable Header 1×8 pins (Black)
Wemos ESP8266
40.95 AED 40.95 AED (Tax included)

Terms and Conditions
30-day money-back guarantee
Shipping: 2-3 Business Days
 

Features

  • ESP8266 WiFi microcontroller
  • 32Mb (4MB) flash memory
  • CP2104 USB-to-Serial interface
  • Onboard ceramic WiFi antenna
  • External antenna connector (IPEX)
  • Pin-compatible with WeMos D1 Mini / Mini PRO
  • Micro USB for power and programming
  • Supports Arduino IDE (ESP8266 core)

Specifications

  • Microcontroller: ESP8266
  • Operating Voltage: 3.3V
  • Input Voltage (5V Pin): 4–9V DC
  • Recommended Input: 5V DC
  • Flash Memory: 32Mb (4MB)
  • Clock Frequency: 80MHz / 160MHz
  • WiFi Standard: 802.11 b/g/n
  • USB Interface: CP2104
  • Antenna: Onboard ceramic + external antenna connector
  • Digital I/O Pins: 11
  • Analog Input Pins: 1 (A0)

Pinout

  • 5V – 5V Power Input
  • 3V3 – 3.3V Power Input/Output
  • G – Ground
  • D0 – GPIO16
  • D1 – GPIO5 (I2C SCL)
  • D2 – GPIO4 (I2C SDA)
  • D3 – GPIO0
  • D4 – GPIO2
  • D5 – GPIO14 (SPI SCK)
  • D6 – GPIO12 (SPI MISO)
  • D7 – GPIO13 (SPI MOSI)
  • D8 – GPIO15 (SPI CS)
  • RX – UART RX
  • TX – UART TX
  • A0 – Analog Input (Max 3.3V)
  • RST – Reset

How to Install ESP8266 D1 Mini Support in Arduino IDE

1. Install Arduino IDE

  1. Download Arduino IDE from https://www.arduino.cc/en/software

  2. Install and open the Arduino IDE

2. Add ESP8266 Board Manager URL

  1. Open Arduino IDE

  2. Go to File → Preferences

  3. Find the field called Additional Boards Manager URLs

  4. Add the following URL:

http://arduino.esp8266.com/stable/package_esp8266com_index.json

  1. Click OK

3. Install ESP8266 Board Package

  1. Go to Tools → Board → Boards Manager

  2. Search for ESP8266

  3. Find ESP8266 by ESP8266 Community

  4. Click Install

  5. Wait for installation to complete

Power Options

  • Via Micro USB (5V)
  • Via 5V pin (4–9V input, recommended 5V)
  • Via regulated 3.3V source to 3V3 pin

Schematics

  • ESP8266 core module with 32Mb flash
  • CP2104 USB-to-Serial circuit
  • 3.3V voltage regulator
  • Boot mode configuration circuit
  • Antenna switching circuit (ceramic / external)

Applications

  • IoT development
  • Home automation systems
  • Wireless sensor networks
  • Web-based control systems
  • MQTT communication projects
  • Remote monitoring systems

Resources