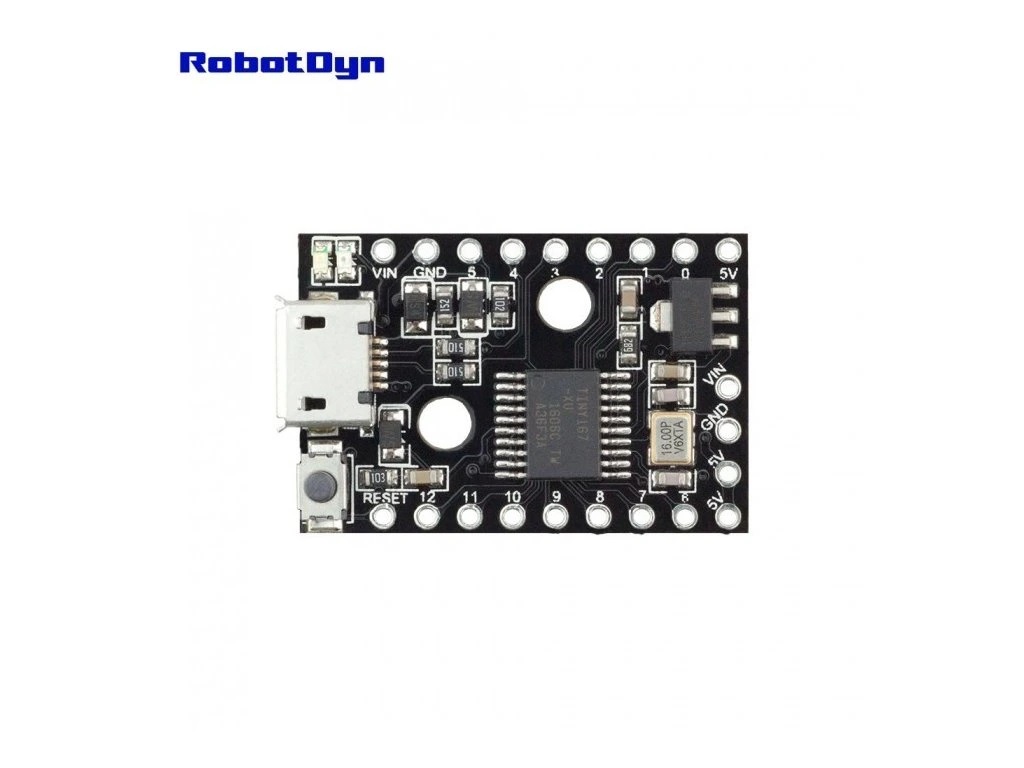
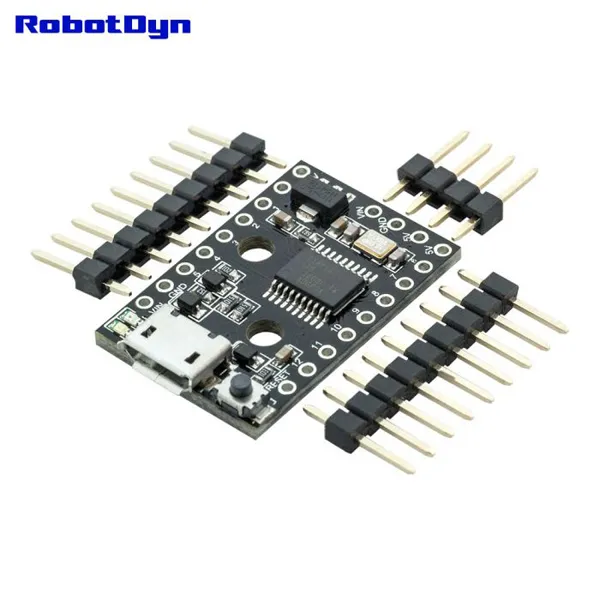
Features:
- Compatible with Arduino IDE 1.5 (OSX/Win/Linux)
- Fully signed drivers and executable for easy installation
- USB programming, USB device emulation, USB-CDC virtual serial port emulation
- 16 MHz AVR MCU – using a true 16Mhz precision crystal
- 16KB Flash Memory (14.5K+ after bootloader)
- Serial over USB debugging and communication!
- 14 I/O Pins (2 shared with USB)
- I2C, true SPI, UART, LIN, and USI
- ADC on 10 pins
- 3 PWM Channels (which can be assigned to a selection of pins)
- Power via USB, or External Source – 5v or 6-16v (automatic selection)
- An on-board button that can be used as a reset, program, or user button – or can be disabled
to use that pin as general i/o – without changing the bootloader - On-board 150mA 5V regulator
- Power LED and Test/Status LED (on Pin 1)
- User-accessible solder jumpers to disable LEDs, and other features for lower power consumption
- Two mounting holes.
- Breadboard compatible pinout/spacing (the three side header pins are only for legacy shield support).
Principle of Work:
RobotDYN just like Arduino is Free hardware, anything whose blueprints and specs are available for anybody to copy. This means that RobotDYN which works on the Arduino platform is the framework that any other individual or business can design their own boards, each of which can be unique yet function well when built upon the same framework. Free software is a computer program whose source code is available to anybody, allowing them to use and alter it as they see fit. In order to allow anyone to create apps for boards and Arduino IDE with a variety of utilities, Arduino IDEs the Arduino IDE (Integrated Development Environment) platform. which you can use to program and upload your code (sketch) and do this using an embedded software USB Functionality using the V-BUS library with the help of an embedded bootloader, the uses libraries that can be downloaded online and gives you the ability to program a significant number of sensors and module without even knowing how they really work.
Pinout of the Module:

| Feature | Description |
|---|---|
| Digital I/O | 13 digital input/output pins. Can be configured as digital inputs to read logic levels (0 or 1), or as digital outputs to control external modules such as LEDs, relays, and other peripherals. |
| PWM Pins | 6 pins support PWM (Pulse Width Modulation) output for controlling brightness, motor speed, and other analog-like output applications. |
| Analog Inputs | 8 onboard analog input pins for reading analog sensor values. |
| GND | Ground reference pins used to complete the electrical circuit. |
| AREF |
Analog reference voltage input (0–5V). Used with analogReference() to set
the upper limit of the analog input range.
|
| I2C Protocol |
SDA – IIC data communication line SCL – IIC clock communication line |
| UART | Serial communication available on digital pins 6 (RX) and 7 (TX). |
| USB Connection | Software-based USB functionality using the V-USB library. No dedicated serial converter onboard. Driver installation is required for PC connection. |
| Onboard LED | Built-in LED connected to digital pin 1. LED turns ON when the pin is HIGH, and turns OFF when the pin is LOW. |
| Voltage Regulator | Converts external DC 7–12V input into regulated 5V supply for the processor and onboard components. |
| 5V Power Pin | Provides regulated 5V output for powering external modules. |
| Vin | External power input pin (DC 7–12V) for supplying power to the board. |
| Power LED Indicator | LED indicator shows board power status. If ON, the board is powered correctly. If OFF, power connection should be checked. |
Applications:
- Industrial machinery controlling systems
- Solar applications
- IOT based applications
- Power supply and charger-based applications
- Weather sensor systems
- Wireless communication applications
- Security based applications
- Medical & health equipment
- Automobile related applications
Circuit:
We will not need any circuit, in this testing code, we will rely on the built-in LED on the 1 pin.
Connecting with First Time
1. Open Arduino IDE
If you haven’t done so already, download Arduino IDE from the software page.
2. Connect the board to your computer
Adding Additional Boards Manager URLs
- From the top menu of the Arduino IDE application, select File → Preferences to open the Preferences dialog box.
- Paste the following in the Additional Boards Manager URLs: box of the Preferences dialog box. If you have multiple URLs then separate them with commas.
http://digistump.com/package_digistump_index.json
- Click the OK button.
Installing RobotDYN Board Support Package
- In the Arduino IDE, navigate to Tools → Board → Boards Manager… to open the Boards Manager window.
- Type RobotDYN into the search field at the top of the Boards Manager dialog box window.
- After filtering, Digistump AVR Boards is displayed in the Boards Manager then click on the Install button of the Digistump item in the dialog box, as shown in the image below.
- After clicking the Install button, the package will start installing.
- When the installation completes, click the Close button.
Install the RobotDYN Windows 10 Drivers
- Download the RobotDYN Digistump Drivers for Windows.
- Extract the Digistump.Drivers.zip which we just downloaded.
- Double-click either DPinst64.exe on a 64-bit Windows computer or DPinst.exe on a 32-bit Windows computer to install the RobotDYN drivers.
- Click on the install button when prompted.
- If a dialog box pops up that displays Windows can’t verify the publisher of this driver software, click the Install this driver software anyway button.
3. Select Board
The RobotDYN works a bit differently than some Arduino-compatible products. The RobotDYN programs with a different procedure.
First, from the Tools menu select Board→RobotDYN pro(16Mhz)
(The Tools→Programmer & Tools→Port selection does not matter)
4. Upload a sketch
- Now write some code or open a RobotDYN example. Then click on the upload button (do not connect the Digspark to your PC)
- Hit the upload button. The bottom status box will now ask you to plug in your RobotDYN – at this point, you need to plug it in, or if already plugged then unplug and replug it.
-
You’ll see the upload progress and then it will immediately run your code on RobotDYN .
If you unplug the RobotDYN and plug it back in or attach it to another power source there will be a delay of 5 seconds before the code you programmed will run. This 5-second delay is the RobotDYN checking to see if you are trying to program it.
Code:
void setup() {
 pinMode(1, OUTPUT); // On board LED terhubung dengan port 1 attiny167
}
void loop() {
 digitalWrite(1, HIGH);
 delay(200);
 digitalWrite(1, LOW);
 delay(200);
}
Technical Details:
- Microcontroller - ATtiny167
- Clock frequency - 16 MHz (8bit)
- inputs/outputs
- Overall – 14th
- digital pins – 14
- digital PWM pins – 3
- analog pins - 11
- connections
- I²C, SPI, UART, LIN, and USI
- Storage
- SRAM - 512 bytes
- EEPROM - 512 bytes
- Flash Memory - 16KB
- Current & Voltage
- Operating Voltage - 5V/DC
- via USB or VIN pin
- max. current per IO pin – 40mA
- Operating Voltage - 5V/DC
- Dimensions (L x W x H) - 28 x 19 x 4.5mm
- Weight - 4g
Resources:
- Arduino IDE Download
- The reference for the language
- RobotDYN Digistump Drivers for Windows.
- Handbook of the C++ language
- Getting to know the Arduino IDE
- RobotDYN programming features
- ATtiny167 Datasheet
Comparisons:
There is no hardware USB module included with the ATtiny167. The V-USB specialized library, however, is what allows it to imitate the USB1.1 protocol. It is really simple to create USB-connected devices such a keyboard, mouse, joystick, and virtual COM port. The RobotDYN also features an LDO regulator that powers the board when a voltage between 7 and 12 V is applied to the VIN pin. The RobotDYN 167 pro features 13 pins as opposed to the RobotDYN 85's 6 pins, making it a more viable option for any project. It also has extra PWM and analog pins accessible. Another reason for RobotDYN 's popularity is that it works with Arduino. but still we can not recommend this board for beginners.
Features:
- Compatible with Arduino IDE 1.5 (OSX/Win/Linux)
- Fully signed drivers and executable for easy installation
- USB programming, USB device emulation, USB-CDC virtual serial port emulation
- 16 MHz AVR MCU – using a true 16Mhz precision crystal
- 16KB Flash Memory (14.5K+ after bootloader)
- Serial over USB debugging and communication!
- 14 I/O Pins (2 shared with USB)
- I2C, true SPI, UART, LIN, and USI
- ADC on 10 pins
- 3 PWM Channels (which can be assigned to a selection of pins)
- Power via USB, or External Source – 5v or 6-16v (automatic selection)
- An on-board button that can be used as a reset, program, or user button – or can be disabled
to use that pin as general i/o – without changing the bootloader - On-board 150mA 5V regulator
- Power LED and Test/Status LED (on Pin 1)
- User-accessible solder jumpers to disable LEDs, and other features for lower power consumption
- Two mounting holes.
- Breadboard compatible pinout/spacing (the three side header pins are only for legacy shield support).
Principle of Work:
RobotDYN just like Arduino is Free hardware, anything whose blueprints and specs are available for anybody to copy. This means that RobotDYN which works on the Arduino platform is the framework that any other individual or business can design their own boards, each of which can be unique yet function well when built upon the same framework. Free software is a computer program whose source code is available to anybody, allowing them to use and alter it as they see fit. In order to allow anyone to create apps for boards and Arduino IDE with a variety of utilities, Arduino IDEs the Arduino IDE (Integrated Development Environment) platform. which you can use to program and upload your code (sketch) and do this using an embedded software USB Functionality using the V-BUS library with the help of an embedded bootloader, the uses libraries that can be downloaded online and gives you the ability to program a significant number of sensors and module without even knowing how they really work.
Pinout of the Module:
| Feature | Description |
|---|---|
| Digital I/O | 13 digital input/output pins. Can be configured as digital inputs to read logic levels (0 or 1), or as digital outputs to control external modules such as LEDs, relays, and other peripherals. |
| PWM Pins | 6 pins support PWM (Pulse Width Modulation) output for controlling brightness, motor speed, and other analog-like output applications. |
| Analog Inputs | 8 onboard analog input pins for reading analog sensor values. |
| GND | Ground reference pins used to complete the electrical circuit. |
| AREF |
Analog reference voltage input (0–5V). Used with analogReference() to set
the upper limit of the analog input range.
|
| I2C Protocol |
SDA – IIC data communication line SCL – IIC clock communication line |
| UART | Serial communication available on digital pins 6 (RX) and 7 (TX). |
| USB Connection | Software-based USB functionality using the V-USB library. No dedicated serial converter onboard. Driver installation is required for PC connection. |
| Onboard LED | Built-in LED connected to digital pin 1. LED turns ON when the pin is HIGH, and turns OFF when the pin is LOW. |
| Voltage Regulator | Converts external DC 7–12V input into regulated 5V supply for the processor and onboard components. |
| 5V Power Pin | Provides regulated 5V output for powering external modules. |
| Vin | External power input pin (DC 7–12V) for supplying power to the board. |
| Power LED Indicator | LED indicator shows board power status. If ON, the board is powered correctly. If OFF, power connection should be checked. |
Applications:
- Industrial machinery controlling systems
- Solar applications
- IOT based applications
- Power supply and charger-based applications
- Weather sensor systems
- Wireless communication applications
- Security based applications
- Medical & health equipment
- Automobile related applications
Circuit:
We will not need any circuit, in this testing code, we will rely on the built-in LED on the 1 pin.
Connecting with First Time
1. Open Arduino IDE
If you haven’t done so already, download Arduino IDE from the software page.
2. Connect the board to your computer
Adding Additional Boards Manager URLs
- From the top menu of the Arduino IDE application, select File → Preferences to open the Preferences dialog box.
- Paste the following in the Additional Boards Manager URLs: box of the Preferences dialog box. If you have multiple URLs then separate them with commas.
http://digistump.com/package_digistump_index.json
- Click the OK button.
Installing RobotDYN Board Support Package
- In the Arduino IDE, navigate to Tools → Board → Boards Manager… to open the Boards Manager window.
- Type RobotDYN into the search field at the top of the Boards Manager dialog box window.
- After filtering, Digistump AVR Boards is displayed in the Boards Manager then click on the Install button of the Digistump item in the dialog box, as shown in the image below.
- After clicking the Install button, the package will start installing.
- When the installation completes, click the Close button.
Install the RobotDYN Windows 10 Drivers
- Download the RobotDYN Digistump Drivers for Windows.
- Extract the Digistump.Drivers.zip which we just downloaded.
- Double-click either DPinst64.exe on a 64-bit Windows computer or DPinst.exe on a 32-bit Windows computer to install the RobotDYN drivers.
- Click on the install button when prompted.
- If a dialog box pops up that displays Windows can’t verify the publisher of this driver software, click the Install this driver software anyway button.
3. Select Board
The RobotDYN works a bit differently than some Arduino-compatible products. The RobotDYN programs with a different procedure.
First, from the Tools menu select Board→RobotDYN pro(16Mhz)
(The Tools→Programmer & Tools→Port selection does not matter)
4. Upload a sketch
- Now write some code or open a RobotDYN example. Then click on the upload button (do not connect the Digspark to your PC)
- Hit the upload button. The bottom status box will now ask you to plug in your RobotDYN – at this point, you need to plug it in, or if already plugged then unplug and replug it.
-
You’ll see the upload progress and then it will immediately run your code on RobotDYN .
If you unplug the RobotDYN and plug it back in or attach it to another power source there will be a delay of 5 seconds before the code you programmed will run. This 5-second delay is the RobotDYN checking to see if you are trying to program it.
Code:
void setup() {
 pinMode(1, OUTPUT); // On board LED terhubung dengan port 1 attiny167
}
void loop() {
 digitalWrite(1, HIGH);
 delay(200);
 digitalWrite(1, LOW);
 delay(200);
}
Technical Details:
- Microcontroller - ATtiny167
- Clock frequency - 16 MHz (8bit)
- inputs/outputs
- Overall – 14th
- digital pins – 14
- digital PWM pins – 3
- analog pins - 11
- connections
- I²C, SPI, UART, LIN, and USI
- Storage
- SRAM - 512 bytes
- EEPROM - 512 bytes
- Flash Memory - 16KB
- Current & Voltage
- Operating Voltage - 5V/DC
- via USB or VIN pin
- max. current per IO pin – 40mA
- Operating Voltage - 5V/DC
- Dimensions (L x W x H) - 28 x 19 x 4.5mm
- Weight - 4g
Resources:
- Arduino IDE Download
- The reference for the language
- RobotDYN Digistump Drivers for Windows.
- Handbook of the C++ language
- Getting to know the Arduino IDE
- RobotDYN programming features
- ATtiny167 Datasheet
Comparisons:
There is no hardware USB module included with the ATtiny167. The V-USB specialized library, however, is what allows it to imitate the USB1.1 protocol. It is really simple to create USB-connected devices such a keyboard, mouse, joystick, and virtual COM port. The RobotDYN also features an LDO regulator that powers the board when a voltage between 7 and 12 V is applied to the VIN pin. The RobotDYN 167 pro features 13 pins as opposed to the RobotDYN 85's 6 pins, making it a more viable option for any project. It also has extra PWM and analog pins accessible. Another reason for RobotDYN 's popularity is that it works with Arduino. but still we can not recommend this board for beginners.