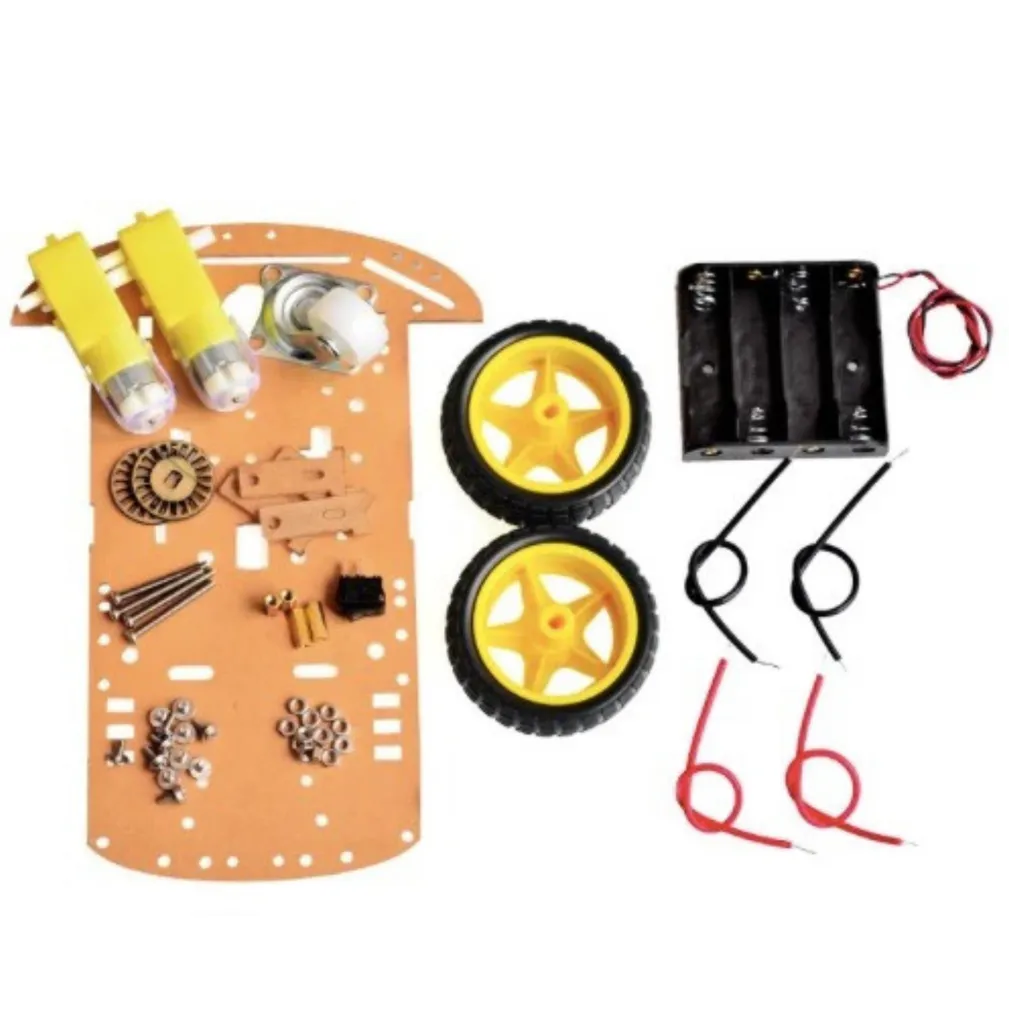
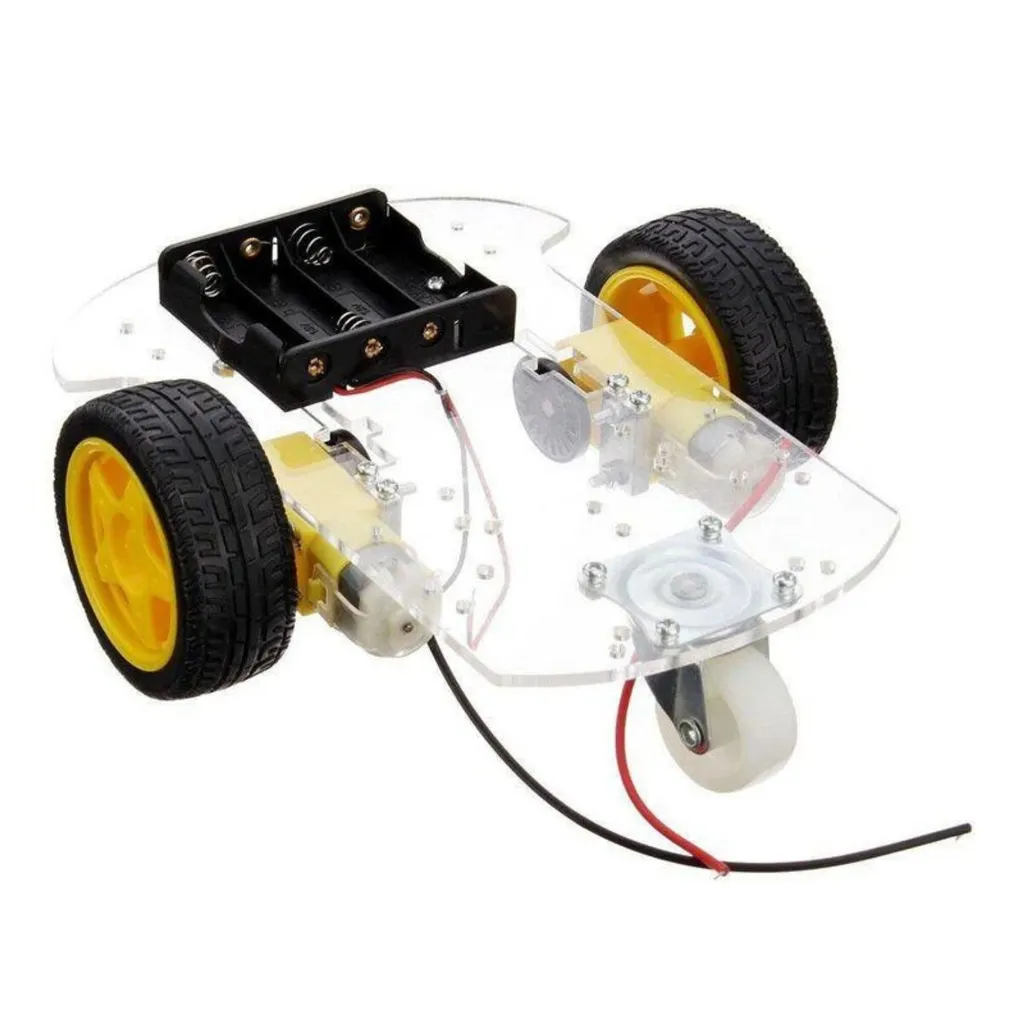
The simple mechanical design allows quick assembly and easy integration with microcontrollers such as Arduino, Raspberry Pi, ESP32, and other development boards. Additional modules like line tracking sensors, ultrasonic distance sensors, motor drivers, and wireless control modules can be added to expand the robot capabilities.
Because of its flexibility and compatibility with many sensors and modules, this chassis can be used to build robots capable of line following, obstacle avoidance, speed measurement, remote control vehicles, and autonomous navigation experiments.
Features
- Transparent acrylic robot chassis platform
- Two wheel drive design with DC geared motors
- Encoder code disk for speed and distance measurement
- Simple mechanical structure for easy assembly
- Supports line tracking and obstacle avoidance modules
- Compatible with Arduino, Raspberry Pi, and other controllers
- Expandable platform for robotics development
- Ideal for robotics education and experimentation
Specifications
- Simple mechanical structure for easy installation
- Equipped with a tachometer encoder disc for distance and velocity measurement (sensor not included)
- Compatible with tracing, obstacle avoidance, distance testing, speed testing, and wireless remote control
- Size: approximately 20 x 14 cm (Length x Width)
- Wheel Size: 6.5 cm diameter x 2.7 cm height
- Motor power supply: 3V to 6V
- All parameters provided are tested without load
Project Ideas
- Line following robot
- Obstacle avoidance robot
- Remote control robot car
- Speed measurement robot
- Autonomous navigation robot
- Educational robotics learning platform
How to Use
- Attach the DC motors to the chassis using the provided brackets and screws.
- Mount the wheels onto the motor shafts.
- Install the encoder disk on the motor shaft if speed measurement is required.
- Mount the battery holder to the chassis and connect the power wires.
- Connect the motors to a motor driver module such as L298N or L293D.
- Connect the motor driver to a microcontroller such as Arduino.
- Add sensors such as ultrasonic sensors or line tracking modules depending on the project.
- Upload the control program to the microcontroller to control movement and sensor behavior.
The simple mechanical design allows quick assembly and easy integration with microcontrollers such as Arduino, Raspberry Pi, ESP32, and other development boards. Additional modules like line tracking sensors, ultrasonic distance sensors, motor drivers, and wireless control modules can be added to expand the robot capabilities.
Because of its flexibility and compatibility with many sensors and modules, this chassis can be used to build robots capable of line following, obstacle avoidance, speed measurement, remote control vehicles, and autonomous navigation experiments.
Features
- Transparent acrylic robot chassis platform
- Two wheel drive design with DC geared motors
- Encoder code disk for speed and distance measurement
- Simple mechanical structure for easy assembly
- Supports line tracking and obstacle avoidance modules
- Compatible with Arduino, Raspberry Pi, and other controllers
- Expandable platform for robotics development
- Ideal for robotics education and experimentation
Specifications
- Simple mechanical structure for easy installation
- Equipped with a tachometer encoder disc for distance and velocity measurement (sensor not included)
- Compatible with tracing, obstacle avoidance, distance testing, speed testing, and wireless remote control
- Size: approximately 20 x 14 cm (Length x Width)
- Wheel Size: 6.5 cm diameter x 2.7 cm height
- Motor power supply: 3V to 6V
- All parameters provided are tested without load
Project Ideas
- Line following robot
- Obstacle avoidance robot
- Remote control robot car
- Speed measurement robot
- Autonomous navigation robot
- Educational robotics learning platform
How to Use
- Attach the DC motors to the chassis using the provided brackets and screws.
- Mount the wheels onto the motor shafts.
- Install the encoder disk on the motor shaft if speed measurement is required.
- Mount the battery holder to the chassis and connect the power wires.
- Connect the motors to a motor driver module such as L298N or L293D.
- Connect the motor driver to a microcontroller such as Arduino.
- Add sensors such as ultrasonic sensors or line tracking modules depending on the project.
- Upload the control program to the microcontroller to control movement and sensor behavior.