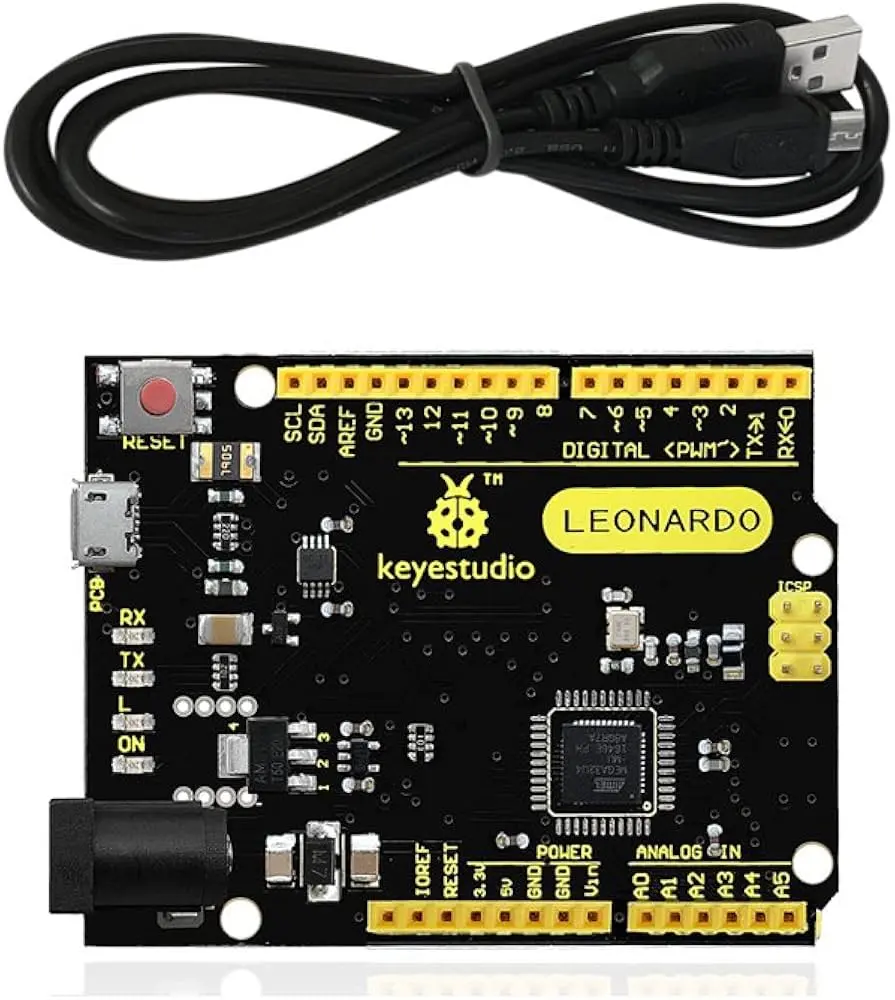
Keyestudio Leonardo R3 Board KS0248
The Keyestudio Leonardo is a powerful development board designed around the high-performance "ATmega32U4" MCU, offering unparalleled versatility. With its integrated USB interface, it can be easily configured as either a keyboard or a mouse when connected to a PC. Compared to the Arduino Uno, the Keyestudio Leonardo boasts 20 digital input/output pins, 7 of which feature PWM capabilities, along with 12 analog input pins for seamless integration of analog sensors. This makes it an ideal choice for hobbyists, tinkerers, and seasoned developers alike.
Features
- Microcontroller: ATmega32U4
- Operating Voltage: 5V
- Input Voltage: 5–12V
- Micro USB connection for programming and communication
- 20 Digital I/O pins, 7 PWM-capable
- 12 Analog input pins (A0–A11)
- RX/TX Serial Port
- Flash Memory: 32KB
- SRAM: 2.5KB
- Clock Speed: 16MHz
- 5V voltage regulator
- Onboard LED (pin 13)
Principle of Work
- Microcontroller: ATmega32U4 handles all computational tasks and controls I/O operations.
- USB Interface: Enables configuration as a keyboard or mouse and direct communication with a PC.
- Digital I/O: 20 pins for input/output operations; 7 PWM-capable for precise control.
- Analog Inputs: 12 pins to read analog signals from sensors.
- UART Serial Communication: Dedicated Rx and Tx pins for data exchange.
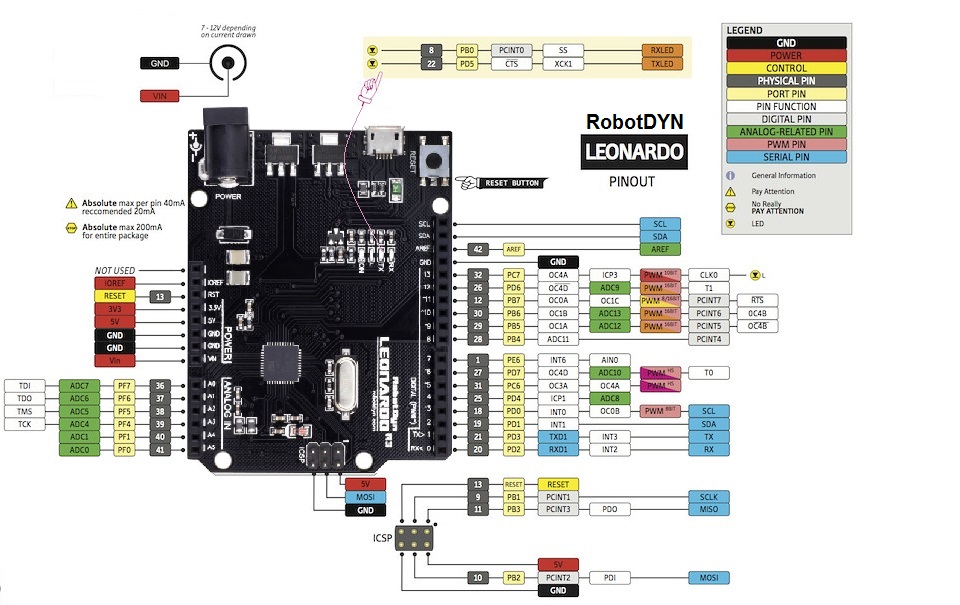
Pinout
Applications
- Prototyping and DIY electronics
- Robotics and automation
- Home automation
- IoT devices
- Wearable electronics
- Interactive art and installations
- Data acquisition and monitoring
- Educational tool for electronics and programming
- Gaming and virtual reality controllers
- Environmental monitoring and audio projects
Getting Started
- Install Arduino IDE from the official website.
- Connect the board to your computer via a data USB cable.
- Select Leonardo under Tools → Board.
- Select the correct COM port under Tools → Port.
- Upload your sketch and open the Serial Monitor if needed.
Example Code
const int ledPin = 13;
const unsigned long blinkInterval = 1000;
bool ledState = false;
unsigned long previousMillis = 0;

void setup() {
pinMode(ledPin, OUTPUT);
Serial.begin(9600);
}

void loop() {
unsigned long currentMillis = millis();
if (currentMillis - previousMillis >= blinkInterval) {
previousMillis = currentMillis;
ledState = !ledState;
digitalWrite(ledPin, ledState);
Serial.println(ledState ? "LED is ON" : "LED is OFF");
}
} Technical Details
- CPU: 8-bit
- Microcontroller: ATmega32U4
- Operating Voltage: 5V
- Input Voltage Max: 12V
- DC Current per I/O Pin: 40 mA
- DC Current for 3.3V Pin: 50 mA
- PCB Dimensions: 71 × 54 × 15 mm
- Weight: 18.4g
Features
- Microcontroller: ATmega32U4
- Operating Voltage: 5V
- Input Voltage: 5–12V
- Micro USB connection for programming and communication
- 20 Digital I/O pins, 7 PWM-capable
- 12 Analog input pins (A0–A11)
- RX/TX Serial Port
- Flash Memory: 32KB
- SRAM: 2.5KB
- Clock Speed: 16MHz
- 5V voltage regulator
- Onboard LED (pin 13)
Principle of Work
- Microcontroller: ATmega32U4 handles all computational tasks and controls I/O operations.
- USB Interface: Enables configuration as a keyboard or mouse and direct communication with a PC.
- Digital I/O: 20 pins for input/output operations; 7 PWM-capable for precise control.
- Analog Inputs: 12 pins to read analog signals from sensors.
- UART Serial Communication: Dedicated Rx and Tx pins for data exchange.
Pinout
Applications
- Prototyping and DIY electronics
- Robotics and automation
- Home automation
- IoT devices
- Wearable electronics
- Interactive art and installations
- Data acquisition and monitoring
- Educational tool for electronics and programming
- Gaming and virtual reality controllers
- Environmental monitoring and audio projects
Getting Started
- Install Arduino IDE from the official website.
- Connect the board to your computer via a data USB cable.
- Select Leonardo under Tools → Board.
- Select the correct COM port under Tools → Port.
- Upload your sketch and open the Serial Monitor if needed.
Example Code
const int ledPin = 13;
const unsigned long blinkInterval = 1000;
bool ledState = false;
unsigned long previousMillis = 0;

void setup() {
pinMode(ledPin, OUTPUT);
Serial.begin(9600);
}

void loop() {
unsigned long currentMillis = millis();
if (currentMillis - previousMillis >= blinkInterval) {
previousMillis = currentMillis;
ledState = !ledState;
digitalWrite(ledPin, ledState);
Serial.println(ledState ? "LED is ON" : "LED is OFF");
}
}
Technical Details
- CPU: 8-bit
- Microcontroller: ATmega32U4
- Operating Voltage: 5V
- Input Voltage Max: 12V
- DC Current per I/O Pin: 40 mA
- DC Current for 3.3V Pin: 50 mA
- PCB Dimensions: 71 × 54 × 15 mm
- Weight: 18.4g