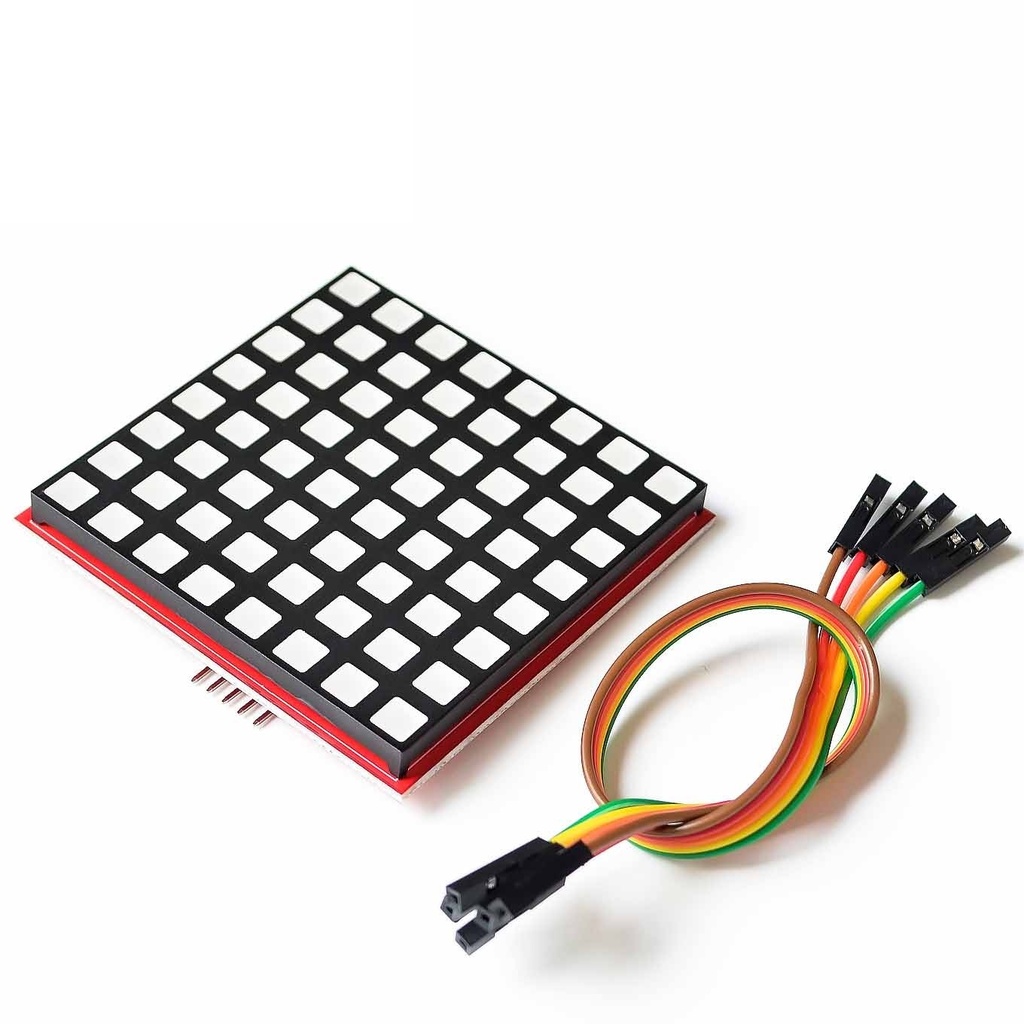
Features:
- Based on 74HC595 shift register chip
- Uses SPI protocol for communication
- Low power consumption
- RGB LEDs with full-color mixing capability
Compatibility:
| Platform | Supported |
|---|---|
| Raspberry Pi 3 Model B+ | ✓ |
| Raspberry Pi 3 Model B | ✓ |
| Raspberry Pi 2 Model B | ✓ |
| Raspberry Pi Zero / Zero W | ✓ |
| Arduino | ✓ |
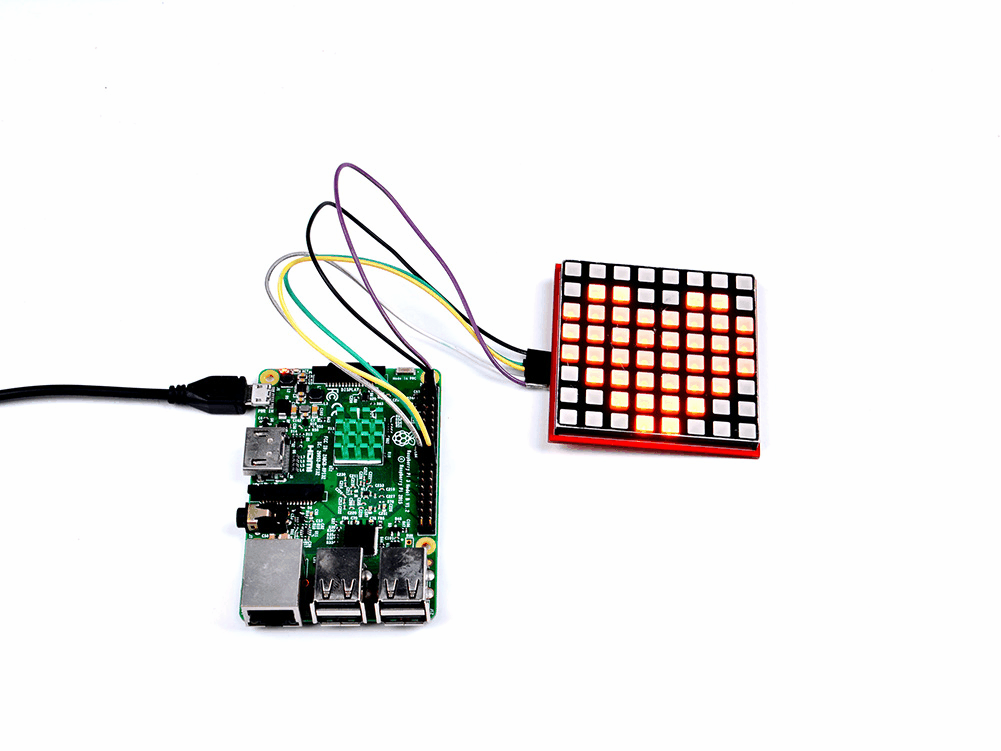
Wiring Guide:
| Raspberry Pi | 8x8 RGB Matrix | Arduino |
|---|---|---|
| 5V | VCC | 5V |
| GPIO 11 | CLK | Pin 13 |
| GPIO 8 | CE | Pin 10 |
| GPIO 10 | MOSI | Pin 11 |
| GND | GND | GND |
Getting Started (Raspberry Pi):
- Enable SPI in
/boot/config.txt:device_tree=bcm2710-rpi-3-b.dtb dtparam=spi=on - Create a file
matrix.cwith the LED display code - Compile using:
sudo gcc -o matrix matrix.c -lwiringPi
- Run the program:
sudo ./matrix
- You’ll see a heart icon on the matrix.
Code Example – Static Heart
Create a file called matrix.c and paste the following code:
#include <stdio.h>
#include <stdint.h>
#include <wiringPi.h>
#include <wiringPiSPI.h>

#define RED_DATA 0
#define BLUE_DATA 1
#define GREEN_DATA 2

int main(void) {
    static uint8_t data[4] = {0x0, 0x0, 0x0, 0x0};
    wiringPiSetup();
    wiringPiSPISetup(0, 500000);
    while (1) {
        static uint8_t heart[8] = {0x00, 0x66, 0xFF, 0xFF, 0xFF, 0x7E, 0x3C, 0x18};
        int j;
        for (j = 0; j < 8; j++) {
            data[0] = ~heart[j];
            data[2] = 0xFF;
            data[1] = 0xFF;
            data[3] = 0x01 << j;
            wiringPiSPIDataRW(0, data, sizeof(data));
            delay(2);
        }
    }
}
Code Example – Heart Beating
Save as heart.c, compile, and run it.
sudo gcc -o heart heart.c -lwiringPi
sudo ./heart
You'll see the heart beating animation!
Using with Arduino:
- Paste this code into Arduino IDE and upload:
#include <SPI.h>

static uint8_t data[4] = {0x0, 0x0, 0x0, 0x0};
const int CE = 10;

void setup() {
  pinMode(CE, OUTPUT);
  SPI.begin();
}

void loop() {
  heartbig();
  matrixoff();
  delay(100);
  heartsmall();
  matrixoff();
  delay(100);
}

void heartbig() {
  static uint8_t heart[8] = {0x00, 0x66, 0xFF, 0xFF, 0xFF, 0x7E, 0x3C, 0x18};
  for (int j = 0; j < 8; j++) {
    data[0] = ~heart[j];
    data[2] = 0xFF;
    data[1] = 0xFF;
    data[3] = 0x01 << j;
    digitalWrite(CE, LOW);
    SPI.transfer(data[0]);
    SPI.transfer(data[2]);
    SPI.transfer(data[1]);
    SPI.transfer(data[3]);
    digitalWrite(CE, HIGH);
    delay(2);
  }
}

void heartsmall() {
  static uint8_t heart[8] = {0x00, 0x00, 0x24, 0x7E, 0x7E, 0x3C, 0x18, 0x00};
  for (int j = 0; j < 8; j++) {
    data[0] = ~heart[j];
    data[2] = 0xFF;
    data[1] = 0xFF;
    data[3] = 0x01 << j;
    digitalWrite(CE, LOW);
    SPI.transfer(data[0]);
    SPI.transfer(data[2]);
    SPI.transfer(data[1]);
    SPI.transfer(data[3]);
    digitalWrite(CE, HIGH);
    delay(2);
  }
}

void matrixoff() {
  static uint8_t heart[8] = {0x00, 0x00, 0x00, 0x00, 0x00, 0x00, 0x00, 0x00};
  for (int j = 0; j < 8; j++) {
    data[0] = ~heart[j];
    data[2] = 0xFF;
    data[1] = 0xFF;
    data[3] = 0x01 << j;
    digitalWrite(CE, LOW);
    SPI.transfer(data[0]);
    SPI.transfer(data[2]);
    SPI.transfer(data[1]);
    SPI.transfer(data[3]);
    digitalWrite(CE, HIGH);
    delay(2);
  }
}
Visual Examples:
Here are some example patterns and animations:

Applications:
- Music Spectrum Displays
- Decorative Lighting Effects
- DIY Bicycle Taillights
- Educational LED Matrix Projects
Features:
- Based on 74HC595 shift register chip
- Uses SPI protocol for communication
- Low power consumption
- RGB LEDs with full-color mixing capability
Compatibility:
| Platform | Supported |
|---|---|
| Raspberry Pi 3 Model B+ | ✓ |
| Raspberry Pi 3 Model B | ✓ |
| Raspberry Pi 2 Model B | ✓ |
| Raspberry Pi Zero / Zero W | ✓ |
| Arduino | ✓ |
Wiring Guide:
| Raspberry Pi | 8x8 RGB Matrix | Arduino |
|---|---|---|
| 5V | VCC | 5V |
| GPIO 11 | CLK | Pin 13 |
| GPIO 8 | CE | Pin 10 |
| GPIO 10 | MOSI | Pin 11 |
| GND | GND | GND |
Getting Started (Raspberry Pi):
- Enable SPI in
/boot/config.txt:device_tree=bcm2710-rpi-3-b.dtb dtparam=spi=on - Create a file
matrix.cwith the LED display code - Compile using:
sudo gcc -o matrix matrix.c -lwiringPi
- Run the program:
sudo ./matrix
- You’ll see a heart icon on the matrix.
Code Example – Static Heart
Create a file called matrix.c and paste the following code:
#include <stdio.h>
#include <stdint.h>
#include <wiringPi.h>
#include <wiringPiSPI.h>

#define RED_DATA 0
#define BLUE_DATA 1
#define GREEN_DATA 2

int main(void) {
    static uint8_t data[4] = {0x0, 0x0, 0x0, 0x0};
    wiringPiSetup();
    wiringPiSPISetup(0, 500000);
    while (1) {
        static uint8_t heart[8] = {0x00, 0x66, 0xFF, 0xFF, 0xFF, 0x7E, 0x3C, 0x18};
        int j;
        for (j = 0; j < 8; j++) {
            data[0] = ~heart[j];
            data[2] = 0xFF;
            data[1] = 0xFF;
            data[3] = 0x01 << j;
            wiringPiSPIDataRW(0, data, sizeof(data));
            delay(2);
        }
    }
}
Code Example – Heart Beating
Save as heart.c, compile, and run it.
sudo gcc -o heart heart.c -lwiringPi
sudo ./heart
You'll see the heart beating animation!
Using with Arduino:
- Paste this code into Arduino IDE and upload:
#include <SPI.h>

static uint8_t data[4] = {0x0, 0x0, 0x0, 0x0};
const int CE = 10;

void setup() {
  pinMode(CE, OUTPUT);
  SPI.begin();
}

void loop() {
  heartbig();
  matrixoff();
  delay(100);
  heartsmall();
  matrixoff();
  delay(100);
}

void heartbig() {
  static uint8_t heart[8] = {0x00, 0x66, 0xFF, 0xFF, 0xFF, 0x7E, 0x3C, 0x18};
  for (int j = 0; j < 8; j++) {
    data[0] = ~heart[j];
    data[2] = 0xFF;
    data[1] = 0xFF;
    data[3] = 0x01 << j;
    digitalWrite(CE, LOW);
    SPI.transfer(data[0]);
    SPI.transfer(data[2]);
    SPI.transfer(data[1]);
    SPI.transfer(data[3]);
    digitalWrite(CE, HIGH);
    delay(2);
  }
}

void heartsmall() {
  static uint8_t heart[8] = {0x00, 0x00, 0x24, 0x7E, 0x7E, 0x3C, 0x18, 0x00};
  for (int j = 0; j < 8; j++) {
    data[0] = ~heart[j];
    data[2] = 0xFF;
    data[1] = 0xFF;
    data[3] = 0x01 << j;
    digitalWrite(CE, LOW);
    SPI.transfer(data[0]);
    SPI.transfer(data[2]);
    SPI.transfer(data[1]);
    SPI.transfer(data[3]);
    digitalWrite(CE, HIGH);
    delay(2);
  }
}

void matrixoff() {
  static uint8_t heart[8] = {0x00, 0x00, 0x00, 0x00, 0x00, 0x00, 0x00, 0x00};
  for (int j = 0; j < 8; j++) {
    data[0] = ~heart[j];
    data[2] = 0xFF;
    data[1] = 0xFF;
    data[3] = 0x01 << j;
    digitalWrite(CE, LOW);
    SPI.transfer(data[0]);
    SPI.transfer(data[2]);
    SPI.transfer(data[1]);
    SPI.transfer(data[3]);
    digitalWrite(CE, HIGH);
    delay(2);
  }
}
Visual Examples:
Here are some example patterns and animations:
Applications:
- Music Spectrum Displays
- Decorative Lighting Effects
- DIY Bicycle Taillights
- Educational LED Matrix Projects