?unique=1abf5b9)
Lilypad LED SMD Module 3V-5V 40mA (White)
Features:
- Voltage: 3V–5V
- Current: 40mA
- Product Dimensions: 5x11mm, 0.8mm tiny PCB
Lilypad LED SMD Module
One of the most commonly asked questions when getting started with e-textiles is "How many LEDs can I put in my project?" In this guide, we will cover the conductive thread's resistance and how that affects powering LEDs, calculations to predict battery and power requirements, and some construction tips.
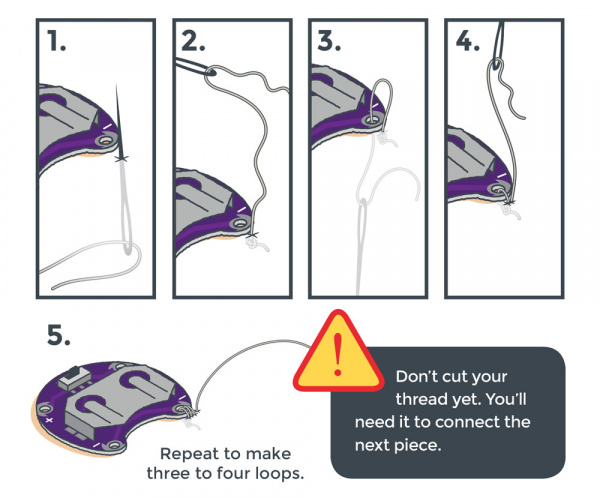
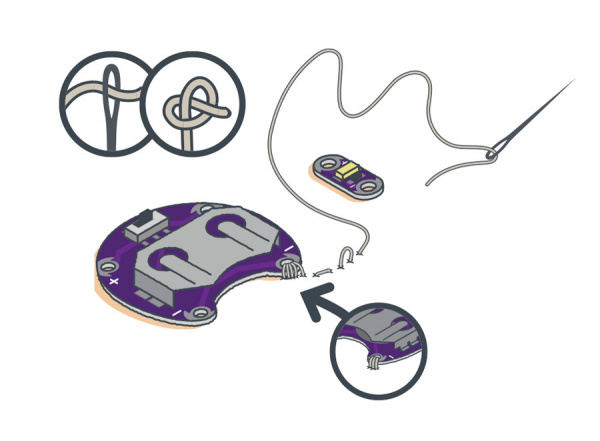
Connecting To LilyPad Sew Tabs
We’ll stitch conductive thread around LilyPad sew tabs in our circuits to connect the pieces together. It’s important that you make three to four loops each time you connect your thread around an empty sew tab and pull the thread snug with each pass. This ensures you have made a strong electrical and physical connection between the thread and the sew tab. Pull loops tight before continuing your stitch.

Sewing Basics
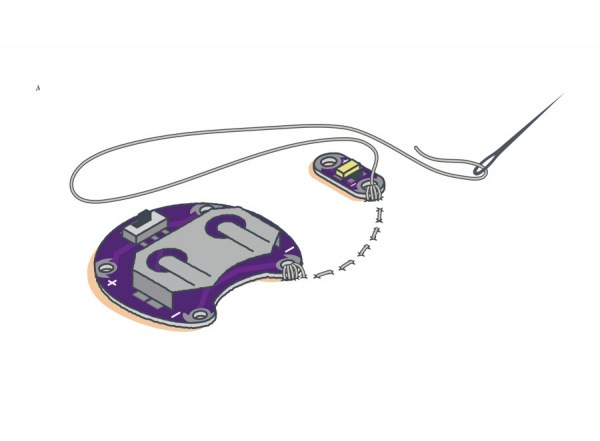
After sewing loops around a sew tab, a running stitch will enable you to connect LilyPad pieces together with a continuous length of conductive thread. Follow these steps:
- Push the needle through the fabric about 1/4" in the direction of your stitch path.
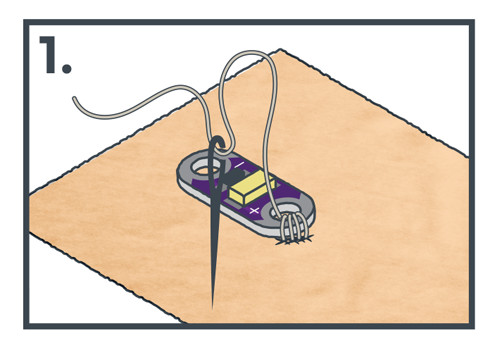
- Pull the slack of the thread through so it sits flush with the fabric.
- Push the needle back up through the fabric another 1/4" along the stitch path.
- Pull the slack of the thread through so it sits flush with the fabric.
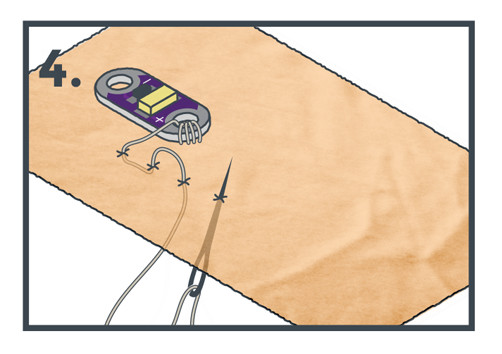
- Repeat this process to travel along the path to the next LilyPad piece you want to connect to, keeping stitches evenly spaced.
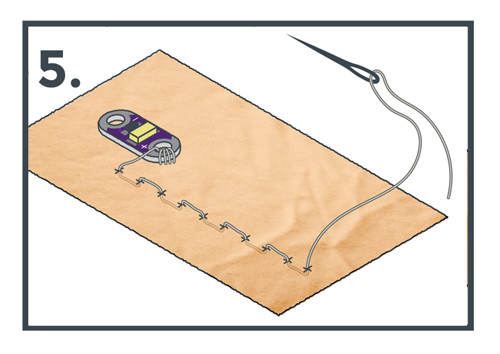
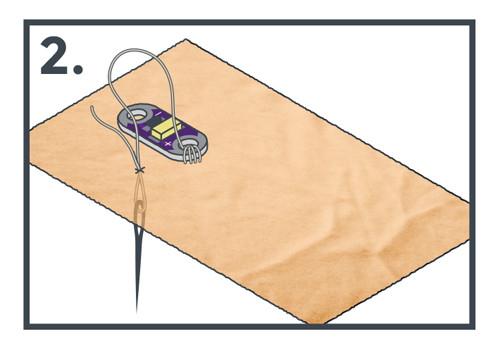
Running vs. Hidden Stitch
In a basic running stitch, the stitching will be even on both sides of the fabric.
To hide the stitches so that they are not seen on the outside of the project, make a longer stitch on the back of the project and a very small stitch on the front. This is called a “hidden stitch.”
As you sew, flip your fabric over every so often to make sure the conductive thread isn’t getting knotted or tangled. Be patient and take your time. If your thread breaks, you can stitch onto the existing conductive thread to continue the electrical connection.
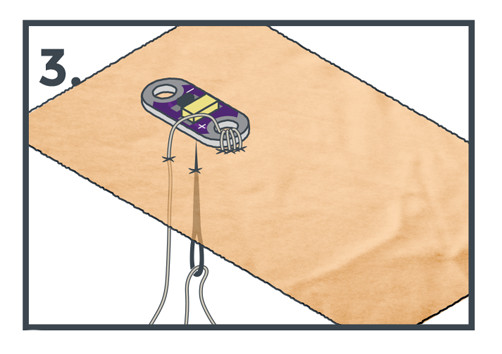
Connecting LilyPad Pieces
Both running and hidden stitches will enable you to connect LilyPad components together with a single length of conductive thread. To connect two LilyPad pieces, continue stitching after completing three to four loops around the sew tab.
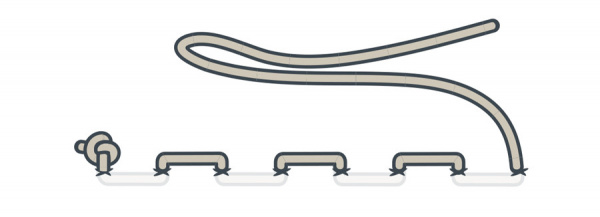
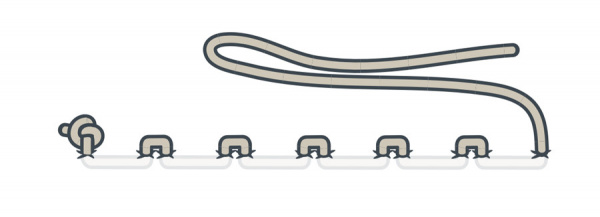
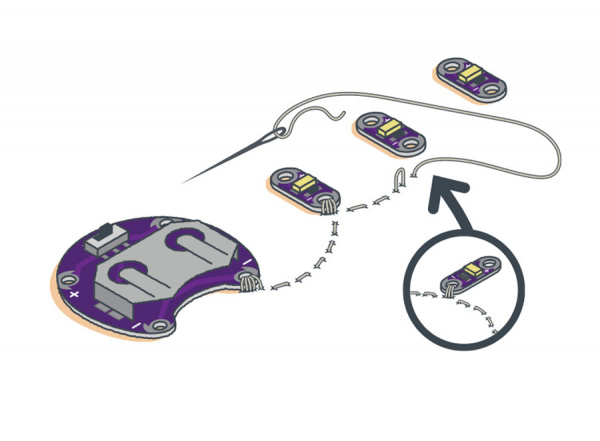
Connecting Multiple LilyPad Pieces
To connect more than two LilyPad pieces, instead of trimming your thread and starting over, continue stitching to the next piece, make three to four loops, and repeat as necessary.


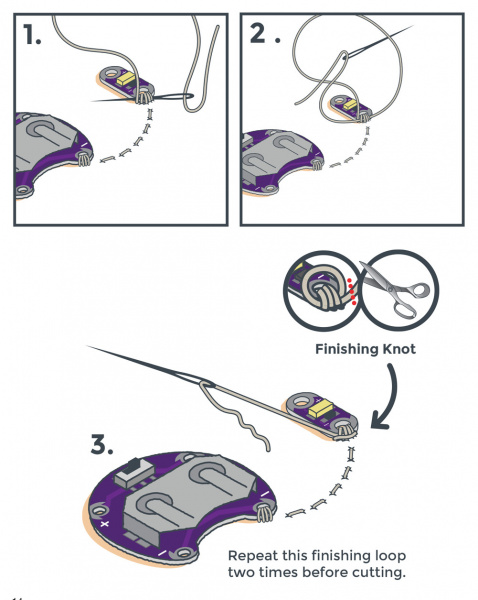
Finishing Your Connection
When you have completed connecting components, use a finishing knot. Thread tails can cause electrical shorts, so be sure to trim your thread afterward.
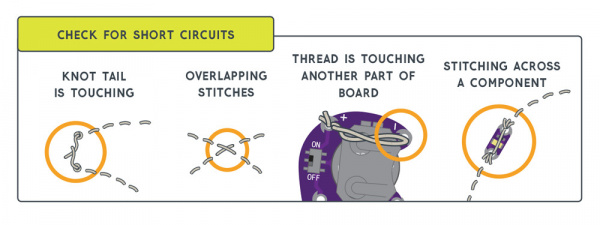
Checking for Conductive Thread Short Circuits
Watch out for any loose threads or knot tails. If any piece of conductive thread from the positive (+) side touches the negative (–) side, it may cause a short circuit.
One of the most common short circuits happens when a loose thread tail near the negative tab on the battery holder touches the battery. Don’t cross stitches. The battery may heat up, though it won’t burn you in most cases.
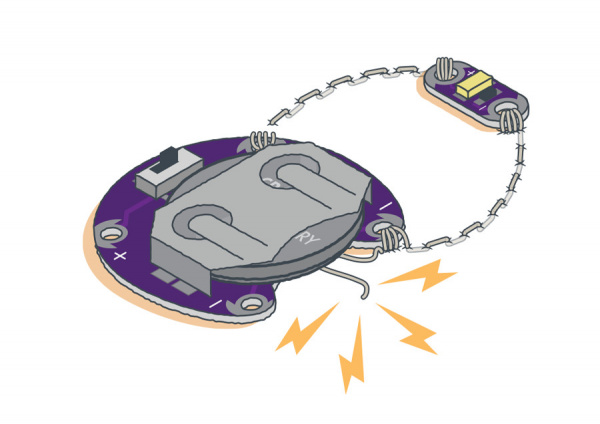
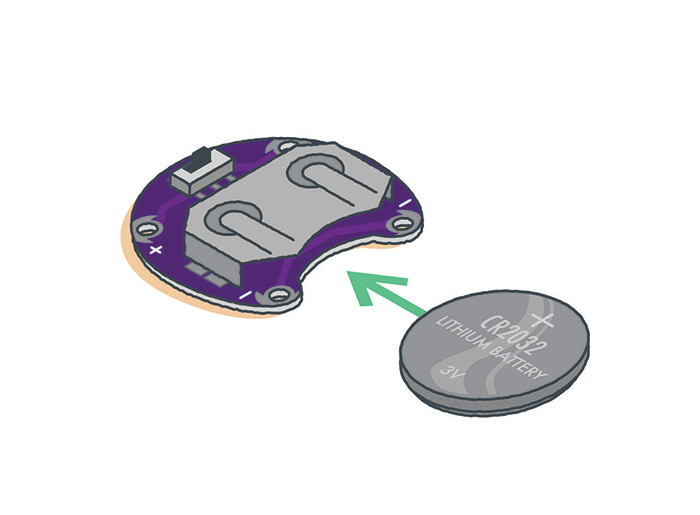
Installing Your Battery and Testing Your Finished Circuit
Once all your pieces are connected with conductive thread, insert the coin cell battery (positive side up) into the holder.
Always remove your battery before continuing work. If your circuit fails, check for shorts, reversed components, or dead batteries.
Light up the LilyPad Sewable Electronics Kit to build your own circuit.
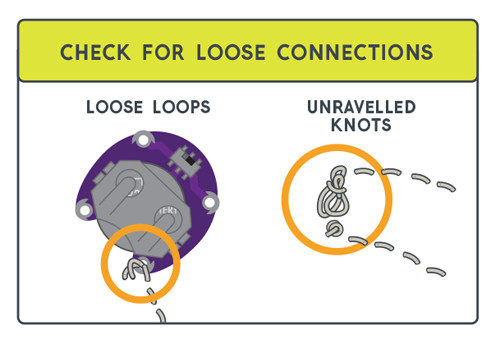
Troubleshooting
Common problems include loose connections, reversed components, or dead batteries.
Is circuit only working sometimes?
Check for loose connections and sew over the existing thread if necessary.
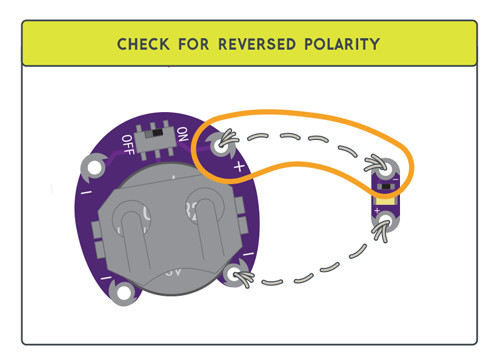
Circuit not working?
Double check polarity. Some components are polarized and will not function if reversed.
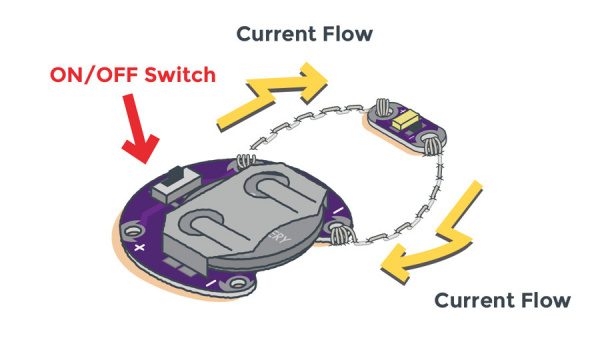
- Make sure the battery switch is ON.
- Check for a dead battery (use a multimeter).
- Double-check connections if following a template.
If needed, use a multimeter to check continuity.
Caring For Your Project
Conductive thread is uninsulated and behaves like bare wire. Avoid shorts by covering with fabric glue, fabric paint, or extra fabric. Never work on a metal surface when using conductive thread.
Features:
- Voltage: 3V–5V
- Current: 40mA
- Product Dimensions: 5x11mm, 0.8mm tiny PCB
Lilypad LED SMD Module
One of the most commonly asked questions when getting started with e-textiles is "How many LEDs can I put in my project?" In this guide, we will cover the conductive thread's resistance and how that affects powering LEDs, calculations to predict battery and power requirements, and some construction tips.
Connecting To LilyPad Sew Tabs
We’ll stitch conductive thread around LilyPad sew tabs in our circuits to connect the pieces together. It’s important that you make three to four loops each time you connect your thread around an empty sew tab and pull the thread snug with each pass. This ensures you have made a strong electrical and physical connection between the thread and the sew tab. Pull loops tight before continuing your stitch.
Sewing Basics
After sewing loops around a sew tab, a running stitch will enable you to connect LilyPad pieces together with a continuous length of conductive thread. Follow these steps:
- Push the needle through the fabric about 1/4" in the direction of your stitch path.
- Pull the slack of the thread through so it sits flush with the fabric.
- Push the needle back up through the fabric another 1/4" along the stitch path.
- Pull the slack of the thread through so it sits flush with the fabric.
- Repeat this process to travel along the path to the next LilyPad piece you want to connect to, keeping stitches evenly spaced.
Running vs. Hidden Stitch
In a basic running stitch, the stitching will be even on both sides of the fabric.
To hide the stitches so that they are not seen on the outside of the project, make a longer stitch on the back of the project and a very small stitch on the front. This is called a “hidden stitch.”
As you sew, flip your fabric over every so often to make sure the conductive thread isn’t getting knotted or tangled. Be patient and take your time. If your thread breaks, you can stitch onto the existing conductive thread to continue the electrical connection.
Connecting LilyPad Pieces
Both running and hidden stitches will enable you to connect LilyPad components together with a single length of conductive thread. To connect two LilyPad pieces, continue stitching after completing three to four loops around the sew tab.
Connecting Multiple LilyPad Pieces
To connect more than two LilyPad pieces, instead of trimming your thread and starting over, continue stitching to the next piece, make three to four loops, and repeat as necessary.
Finishing Your Connection
When you have completed connecting components, use a finishing knot. Thread tails can cause electrical shorts, so be sure to trim your thread afterward.
Checking for Conductive Thread Short Circuits
Watch out for any loose threads or knot tails. If any piece of conductive thread from the positive (+) side touches the negative (–) side, it may cause a short circuit.
One of the most common short circuits happens when a loose thread tail near the negative tab on the battery holder touches the battery. Don’t cross stitches. The battery may heat up, though it won’t burn you in most cases.
Installing Your Battery and Testing Your Finished Circuit
Once all your pieces are connected with conductive thread, insert the coin cell battery (positive side up) into the holder.
Always remove your battery before continuing work. If your circuit fails, check for shorts, reversed components, or dead batteries.
Light up the LilyPad Sewable Electronics Kit to build your own circuit.
Troubleshooting
Common problems include loose connections, reversed components, or dead batteries.
Is circuit only working sometimes?
Check for loose connections and sew over the existing thread if necessary.
Circuit not working?
Double check polarity. Some components are polarized and will not function if reversed.
- Make sure the battery switch is ON.
- Check for a dead battery (use a multimeter).
- Double-check connections if following a template.
If needed, use a multimeter to check continuity.
Caring For Your Project
Conductive thread is uninsulated and behaves like bare wire. Avoid shorts by covering with fabric glue, fabric paint, or extra fabric. Never work on a metal surface when using conductive thread.