- All products
- Sensors & Modules
- Distance + Light
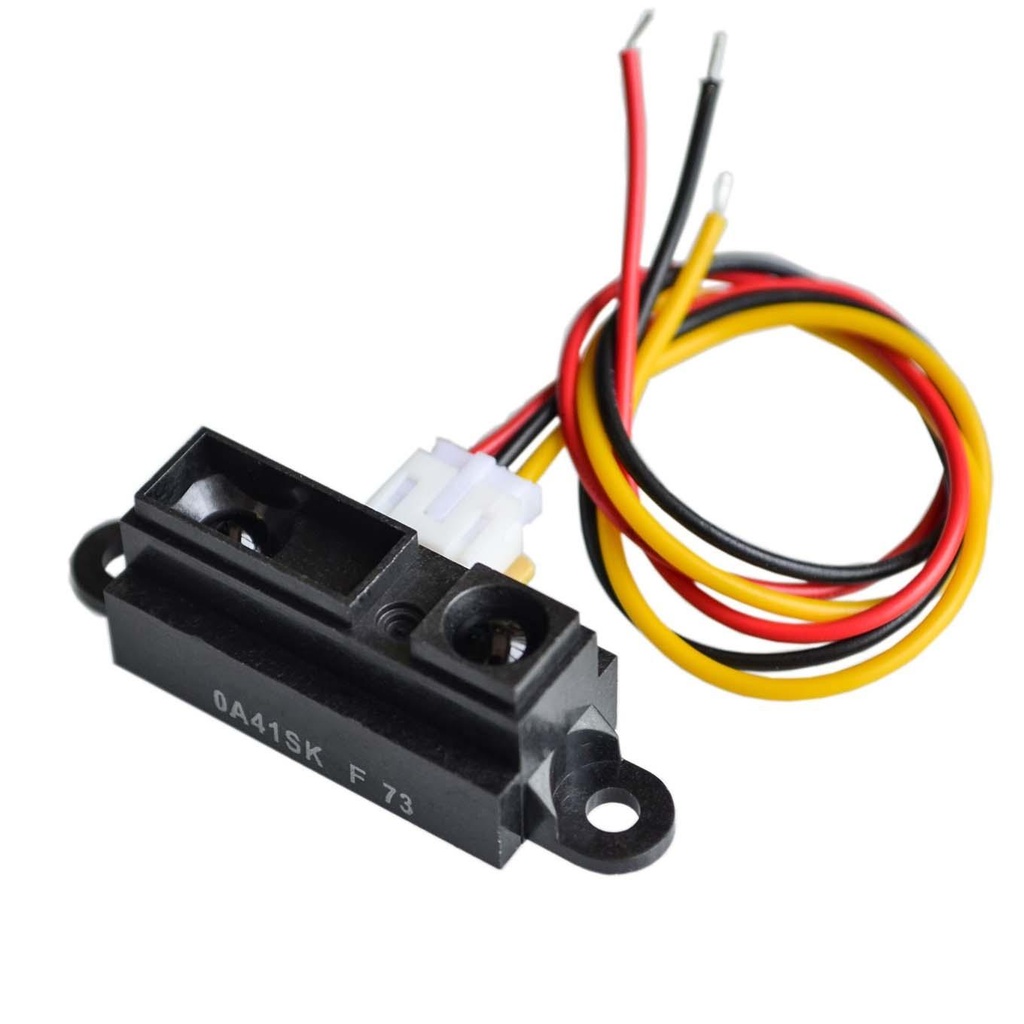
- IR Distance Sensor With Cables Gp2y0a41sk0f 0a41sk 4-30cm
- Distance + Light
Working Principle
- The sensor emits infrared light using an IR-LED.
- When this light hits an object, it reflects back to the PSD.
- The PSD detects the reflected light, and the sensor outputs an analog voltage that corresponds to the distance of the object.
- The output voltage is inversely proportional to the distance, making closer objects produce higher voltages.
Features
- Accurate short-range distance measurement (4 to 30 cm)
- Analog voltage output
- Compact size and easy to integrate
- Low power consumption
- Uses a 3-pin JST PH connector
Wiring Connections
| GP2Y0A41SK0F Sensor | Arduino UNO |
|---|---|
| VCC (red wire) | 5V |
| GND (black wire) | GND |
| Signal (yellow wire) | A0 |
Sample Code
#define sensor A0 // Sharp IR GP2Y0A41SK0F (4-30cm, analog)
void setup() {
Serial.begin(9600); // Start the serial port
}
void loop() {
float volts = analogRead(sensor) * 0.0048828125; // Convert analog to voltage (5V / 1024)
Serial.println(volts);
int distance = 13 * pow(volts, -1); // Estimate distance from voltage
delay(1000); // Delay for readability
if (distance <= 30) {
Serial.println(distance); // Print distance if within range
}
}
Notes
- No external library is required to use this sensor.
- Ensure the sensor is connected to the correct analog pin on the Arduino.
- The formula
13 * pow(volts, -1)is derived from the datasheet curve of output voltage vs. distance.
Understanding the Output
- Why multiply by (5 / 1024)?
Analog pins read a value from 0 to 1023 (10-bit ADC), corresponding to 0V to 5V. Multiplying by (5 / 1024) converts it to real voltage. - What does pow(volts, -1) do?
This calculates the reciprocal of the voltage to approximate the distance based on the sensor's nonlinear response curve.
Getting Started
- Connect the Arduino to your PC using a USB cable.
- Open the Arduino IDE (install from arduino.cc if needed).
- Select the correct board from
Tools > Board. - Select the correct COM port from
Tools > Port.
Applications
- Proximity sensing
- Obstacle detection in robots
- Short-range object detection
- Interactive systems and smart devices