IR Flame and Fire Sensor Module KY-026
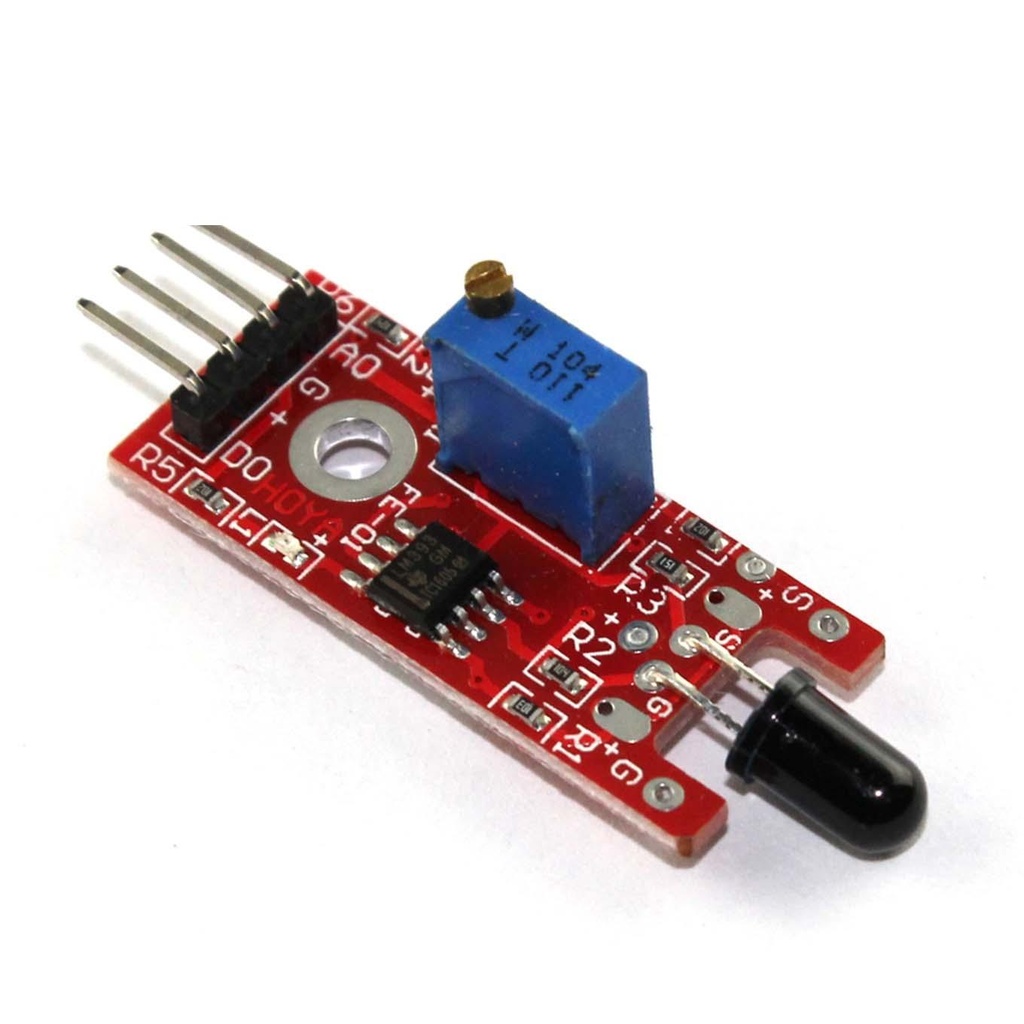
The KY-026 Flame Sensor module is designed to detect infrared light emitted by fires. It offers both digital and analog outputs and features a potentiometer for sensitivity adjustment. This module is commonly employed in fire detection systems, enhancing safety and monitoring in various applications. It is compatible with popular microcontrollers such as Arduino, Raspberry Pi, and ESP32, making it accessible for a wide range of projects.
Specifications
- Operating Voltage: This module operates effectively within a voltage range of 3.3V to 5.5V, providing flexibility in power supply options.
- Infrared Wavelength Detection: It is highly sensitive to infrared wavelengths in the range of 760nm to 1100nm, ensuring precise flame detection.
- Sensor Detection Angle: The sensor offers a wide detection angle of 60 degrees, enhancing its ability to cover a broad area.
- Board Dimensions: Compact in size, the board measures 1.5cm x 3.6cm (0.6in x 1.4in), allowing for easy integration into various projects.
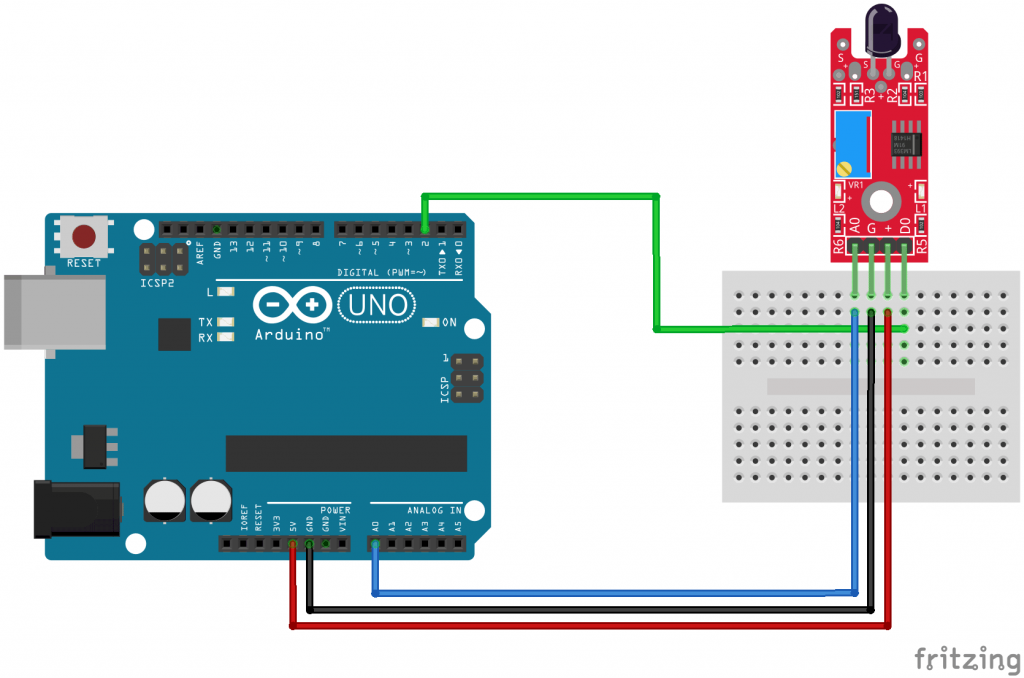
Connection Diagram
To connect the KY-026 Flame Sensor module to an Arduino, follow these simple steps:
- Connect the board's analog output (A0) to pin A0 on the Arduino.
- Connect the digital output (D0) to pin 2 on the Arduino.
- Ensure a power connection by connecting the power line (+) to 5V and the ground (G) to GND on the Arduino.
KY-026 Arduino Code
The provided Arduino code facilitates the interaction with the KY-026 Flame Sensor module. It reads values from both the digital and analog interfaces, responding to the presence of fire or flames. Key features of the code include:
- The digital interface signals fire detection with a HIGH output, illuminating the Arduino's LED (pin 13). The potentiometer adjusts the detection threshold.
- The analog interface provides numeric values that decrease when a flame is near and rise when it moves away.
int led = 13; // Define the LED pin
int digitalPin = 2; // KY-026 digital interface
int analogPin = A0; // KY-026 analog interface
int digitalVal; // Digital readings
int analogVal; // Analog readings
void setup() {
 pinMode(led, OUTPUT);
 pinMode(digitalPin, INPUT);
 Serial.begin(9600);
}
void loop() {
 // Read the digital interface
 digitalVal = digitalRead(digitalPin);
 if (digitalVal == HIGH) // If flame is detected
 {
 digitalWrite(led, HIGH); // Turn ON Arduino's LED
 } else {
 digitalWrite(led, LOW); // Turn OFF Arduino's LED
 }
 // Read the analog interface
 analogVal = analogRead(analogPin);
 Serial.println(analogVal); // Print analog value to the serial monitor
 delay(100);
}
Specifications
- Operating Voltage: This module operates effectively within a voltage range of 3.3V to 5.5V, providing flexibility in power supply options.
- Infrared Wavelength Detection: It is highly sensitive to infrared wavelengths in the range of 760nm to 1100nm, ensuring precise flame detection.
- Sensor Detection Angle: The sensor offers a wide detection angle of 60 degrees, enhancing its ability to cover a broad area.
- Board Dimensions: Compact in size, the board measures 1.5cm x 3.6cm (0.6in x 1.4in), allowing for easy integration into various projects.
Connection Diagram
To connect the KY-026 Flame Sensor module to an Arduino, follow these simple steps:
- Connect the board's analog output (A0) to pin A0 on the Arduino.
- Connect the digital output (D0) to pin 2 on the Arduino.
- Ensure a power connection by connecting the power line (+) to 5V and the ground (G) to GND on the Arduino.
KY-026 Arduino Code
The provided Arduino code facilitates the interaction with the KY-026 Flame Sensor module. It reads values from both the digital and analog interfaces, responding to the presence of fire or flames. Key features of the code include:
- The digital interface signals fire detection with a HIGH output, illuminating the Arduino's LED (pin 13). The potentiometer adjusts the detection threshold.
- The analog interface provides numeric values that decrease when a flame is near and rise when it moves away.
int led = 13; // Define the LED pin
int digitalPin = 2; // KY-026 digital interface
int analogPin = A0; // KY-026 analog interface
int digitalVal; // Digital readings
int analogVal; // Analog readings
void setup() {
 pinMode(led, OUTPUT);
 pinMode(digitalPin, INPUT);
 Serial.begin(9600);
}
void loop() {
 // Read the digital interface
 digitalVal = digitalRead(digitalPin);
 if (digitalVal == HIGH) // If flame is detected
 {
 digitalWrite(led, HIGH); // Turn ON Arduino's LED
 } else {
 digitalWrite(led, LOW); // Turn OFF Arduino's LED
 }
 // Read the analog interface
 analogVal = analogRead(analogPin);
 Serial.println(analogVal); // Print analog value to the serial monitor
 delay(100);
}