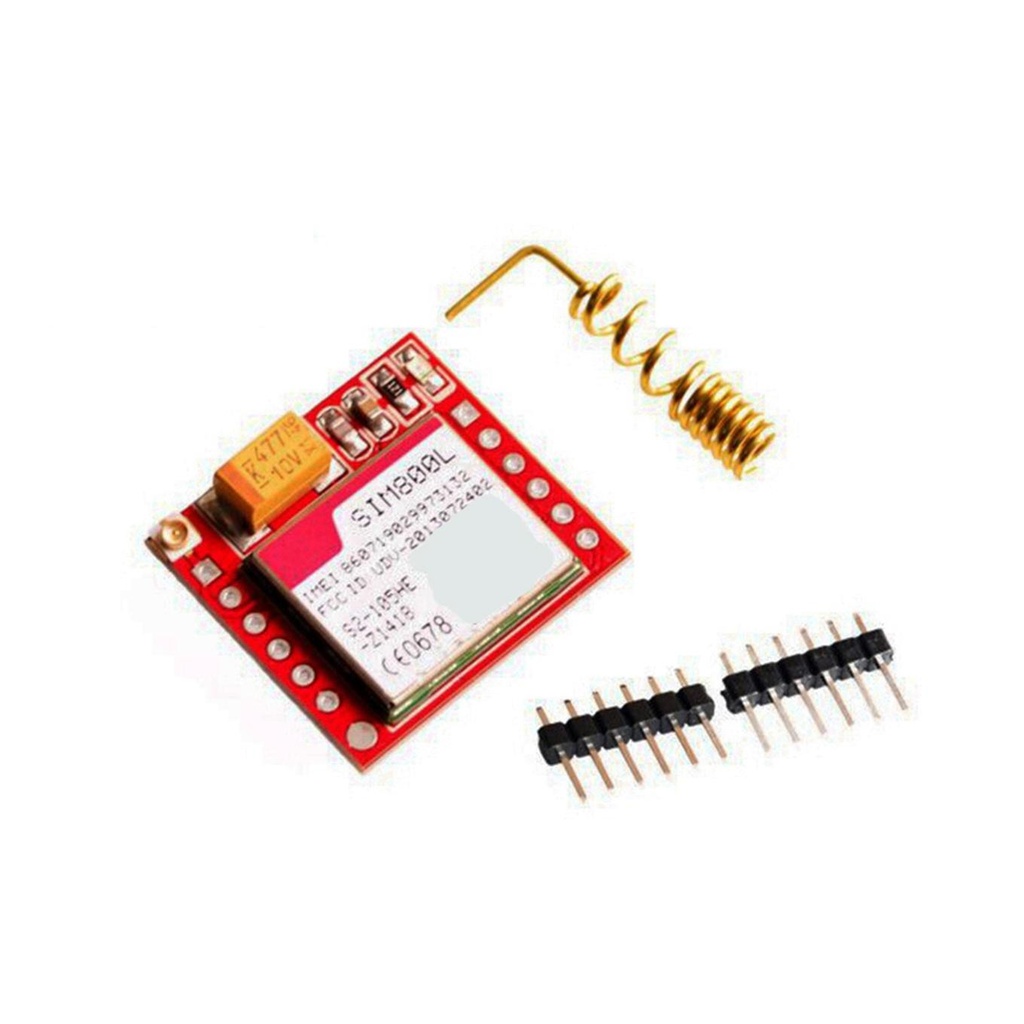
GSM GPRS Sim800L Module Micro SIM Card with Antenna
SIM800L GSM/GPRS Module – Miniature GSM Modem for IoT Projects Whether you want to monitor your house kilometers away or activate your garden watering system remotely with a phone call, the SIM800L GSM/GPRS module is your ideal IoT control node.
This compact GSM modem allows integration into various IoT applications. It enables calling, SMS, and GPRS-based internet (TCP/IP, HTTP), making it perfect for global GSM control projects. Just insert a 2G SIM card and you're good to go!
Features:
- Supports Quad-band: GSM850, EGSM900, DCS1800, PCS1900
- Connect to any global GSM network with a 2G SIM
- Make/receive voice calls using external 8Ω speaker & electret microphone
- Send and receive SMS messages
- Send and receive GPRS data (TCP/IP, HTTP, etc.)
- Scan and receive FM radio broadcasts
- Transmit Power:
- Class 4 (2W) for GSM850
- Class 1 (1W) for DCS1800
- Serial-based AT Command Set
- FL connectors for external GSM antenna
- Accepts Micro SIM card
LED Status Indicators:
- Blink every 1s: Module running but no network connection
- Blink every 2s: Active GPRS connection
- Blink every 3s: Registered on network; voice and SMS ready
The Antenna:
A helical GSM antenna is included and should be soldered to the NET pin on the PCB. It saves space but may have lower reception indoors.
SIM800L GSM/GPRS Pinout:
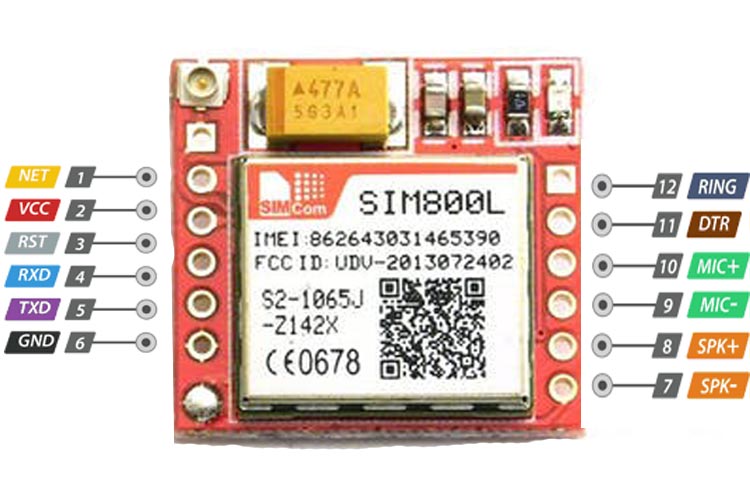
- NET: Solder the included helical antenna here
- VCC: Supply 3.4V–4.4V (Do NOT connect to 5V or 3.3V directly)
- RST: Pull LOW for 100ms to reset
- RxD: Receive data (connect to TX of microcontroller)
- TxD: Transmit data (connect to RX of microcontroller)
- GND: Ground
- RING: Pulses LOW (120ms) on incoming call or SMS
- DTR: Sleep control (HIGH = sleep, LOW = active)
- MIC ±: Differential microphone input
- SPK ±: Differential speaker output
Example Arduino Code:

// Include SoftwareSerial for communication
#include <SoftwareSerial.h>

// Create software serial object for SIM800L communication
SoftwareSerial mySerial(3, 2); // SIM800L Tx to D3, Rx to D2

void setup() {
  Serial.begin(9600);         // Communication with PC
  mySerial.begin(9600);       // Communication with SIM800L
  Serial.println("Initializing...");
  delay(1000);

  mySerial.println("AT");       // Test AT command
  updateSerial();
  mySerial.println("AT+CSQ");   // Check signal quality
  updateSerial();
  mySerial.println("AT+CCID");  // Check SIM card info
  updateSerial();
  mySerial.println("AT+CREG?"); // Check network registration
  updateSerial();
}

void loop() {
  updateSerial();
}

void updateSerial() {
  delay(500);
  while (Serial.available()) {
    mySerial.write(Serial.read());
  }
  while (mySerial.available()) {
    Serial.write(mySerial.read());
  }
}
Features:
- Supports Quad-band: GSM850, EGSM900, DCS1800, PCS1900
- Connect to any global GSM network with a 2G SIM
- Make/receive voice calls using external 8Ω speaker & electret microphone
- Send and receive SMS messages
- Send and receive GPRS data (TCP/IP, HTTP, etc.)
- Scan and receive FM radio broadcasts
- Transmit Power:
- Class 4 (2W) for GSM850
- Class 1 (1W) for DCS1800
- Serial-based AT Command Set
- FL connectors for external GSM antenna
- Accepts Micro SIM card
LED Status Indicators:
- Blink every 1s: Module running but no network connection
- Blink every 2s: Active GPRS connection
- Blink every 3s: Registered on network; voice and SMS ready
The Antenna:
A helical GSM antenna is included and should be soldered to the NET pin on the PCB. It saves space but may have lower reception indoors.
SIM800L GSM/GPRS Pinout:
- NET: Solder the included helical antenna here
- VCC: Supply 3.4V–4.4V (Do NOT connect to 5V or 3.3V directly)
- RST: Pull LOW for 100ms to reset
- RxD: Receive data (connect to TX of microcontroller)
- TxD: Transmit data (connect to RX of microcontroller)
- GND: Ground
- RING: Pulses LOW (120ms) on incoming call or SMS
- DTR: Sleep control (HIGH = sleep, LOW = active)
- MIC ±: Differential microphone input
- SPK ±: Differential speaker output
Example Arduino Code:
// Include SoftwareSerial for communication
#include <SoftwareSerial.h>

// Create software serial object for SIM800L communication
SoftwareSerial mySerial(3, 2); // SIM800L Tx to D3, Rx to D2

void setup() {
  Serial.begin(9600);         // Communication with PC
  mySerial.begin(9600);       // Communication with SIM800L
  Serial.println("Initializing...");
  delay(1000);

  mySerial.println("AT");       // Test AT command
  updateSerial();
  mySerial.println("AT+CSQ");   // Check signal quality
  updateSerial();
  mySerial.println("AT+CCID");  // Check SIM card info
  updateSerial();
  mySerial.println("AT+CREG?"); // Check network registration
  updateSerial();
}

void loop() {
  updateSerial();
}

void updateSerial() {
  delay(500);
  while (Serial.available()) {
    mySerial.write(Serial.read());
  }
  while (mySerial.available()) {
    Serial.write(mySerial.read());
  }
}