- All products
- Communication & IoT
- GPS
- Ublox NEO-7M Module with Ceramic Antenna on Board and SAM Interface
- GPS
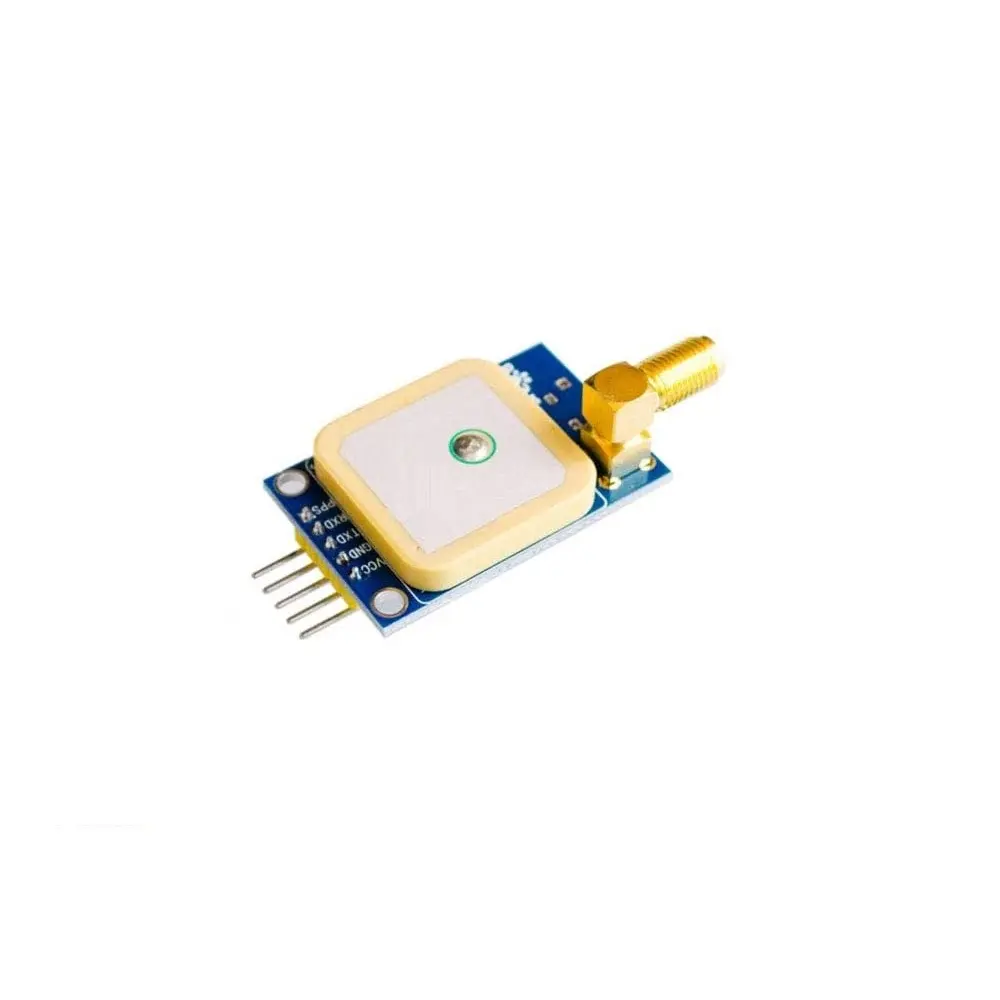
Specifications:
- Part Number: 51 single-chip microcomputer STM32 NEO7M
- RF Family/Standard: 802.15.4
- Protocol: LoRa
- Modulation: FSK, GFSK, GMSK, MSK, OOK
- Frequency: 137MHz - 525MHz
- Data Rate (Max): 300kbps
- Sensitivity: -148dBm
NEO-7M GPS Pinout
| Pin | Description |
|---|---|
| VIN | Module Power Supply (5V) - Provides power to the module. Typically requires a 5V power supply. |
| GND | Ground - Connect this pin to the ground reference of the system. |
| RX | Receive Data via Serial Protocol - Used to receive data from another device via UART. |
| TX | Transmit Data via Serial Protocol - Used to transmit data to another device via UART. |
Connecting NEO-7M GPS With Arduino:
| NEO-7M GPS Pin | Arduino Pin | Connection |
|---|---|---|
| Vin | VCC 5V | Power input (5V) |
| GND | GND | Ground |
| RX | Pin 4 | Input signal |
| TX | Pin 3 | Output signal |
Arduino Setup Instructions:
- Download the TinyGPSPlus Library.
- Open Arduino IDE.
- Go to Sketch → Include Library → Add .ZIP Library.
- Select the downloaded .zip file and click "Open".
- The library will be added to your Arduino IDE.
Upload the Code:
#include "TinyGPS++.h"
#include "SoftwareSerial.h"

static const int RXPin = 4, TXPin = 3;
static const uint32_t GPSBaud = 9600;

TinyGPSPlus gps;
SoftwareSerial ss(RXPin, TXPin);

void setup() {
  Serial.begin(115200);
  ss.begin(GPSBaud);
  Serial.println(F("DeviceExample.ino"));
  Serial.println(F("Testing TinyGPS++ library v."));
  Serial.println(TinyGPSPlus::libraryVersion());
}

void loop() {
  while (ss.available() > 0)
    if (gps.encode(ss.read()))
      displayInfo();

  if (millis() > 5000 && gps.charsProcessed() < 10) {
    Serial.println(F("No GPS detected: check wiring."));
    while(true);
  }
}

void displayInfo() {
  Serial.print(F("Location: "));
  if (gps.location.isValid()) {
    Serial.print(gps.location.lat(), 6);
    Serial.print(F(","));
    Serial.print(gps.location.lng(), 6);
  } else {
    Serial.print(F("INVALID"));
  }

  Serial.print(F(" Date/Time: "));
  if (gps.date.isValid()) {
    Serial.print(gps.date.month());
    Serial.print(F("/"));
    Serial.print(gps.date.day());
    Serial.print(F("/"));
    Serial.print(gps.date.year());
  } else {
    Serial.print(F("INVALID"));
  }

  Serial.print(F(" "));
  if (gps.time.isValid()) {
    if (gps.time.hour() < 10) Serial.print(F("0"));
    Serial.print(gps.time.hour()); Serial.print(F(":"));
    if (gps.time.minute() < 10) Serial.print(F("0"));
    Serial.print(gps.time.minute()); Serial.print(F(":"));
    if (gps.time.second() < 10) Serial.print(F("0"));
    Serial.print(gps.time.second()); Serial.print(F("."));
    if (gps.time.centisecond() < 10) Serial.print(F("0"));
    Serial.print(gps.time.centisecond());
  } else {
    Serial.print(F("INVALID"));
  }
  Serial.println();
}
After uploading the code, you can view the output in the Arduino Serial Monitor.
Specifications:
- Part Number: 51 single-chip microcomputer STM32 NEO7M
- RF Family/Standard: 802.15.4
- Protocol: LoRa
- Modulation: FSK, GFSK, GMSK, MSK, OOK
- Frequency: 137MHz - 525MHz
- Data Rate (Max): 300kbps
- Sensitivity: -148dBm
NEO-7M GPS Pinout
| Pin | Description |
|---|---|
| VIN | Module Power Supply (5V) - Provides power to the module. Typically requires a 5V power supply. |
| GND | Ground - Connect this pin to the ground reference of the system. |
| RX | Receive Data via Serial Protocol - Used to receive data from another device via UART. |
| TX | Transmit Data via Serial Protocol - Used to transmit data to another device via UART. |
Connecting NEO-7M GPS With Arduino:
| NEO-7M GPS Pin | Arduino Pin | Connection |
|---|---|---|
| Vin | VCC 5V | Power input (5V) |
| GND | GND | Ground |
| RX | Pin 4 | Input signal |
| TX | Pin 3 | Output signal |
Arduino Setup Instructions:
- Download the TinyGPSPlus Library.
- Open Arduino IDE.
- Go to Sketch → Include Library → Add .ZIP Library.
- Select the downloaded .zip file and click "Open".
- The library will be added to your Arduino IDE.
Upload the Code:
#include "TinyGPS++.h"
#include "SoftwareSerial.h"

static const int RXPin = 4, TXPin = 3;
static const uint32_t GPSBaud = 9600;

TinyGPSPlus gps;
SoftwareSerial ss(RXPin, TXPin);

void setup() {
  Serial.begin(115200);
  ss.begin(GPSBaud);
  Serial.println(F("DeviceExample.ino"));
  Serial.println(F("Testing TinyGPS++ library v."));
  Serial.println(TinyGPSPlus::libraryVersion());
}

void loop() {
  while (ss.available() > 0)
    if (gps.encode(ss.read()))
      displayInfo();

  if (millis() > 5000 && gps.charsProcessed() < 10) {
    Serial.println(F("No GPS detected: check wiring."));
    while(true);
  }
}

void displayInfo() {
  Serial.print(F("Location: "));
  if (gps.location.isValid()) {
    Serial.print(gps.location.lat(), 6);
    Serial.print(F(","));
    Serial.print(gps.location.lng(), 6);
  } else {
    Serial.print(F("INVALID"));
  }

  Serial.print(F(" Date/Time: "));
  if (gps.date.isValid()) {
    Serial.print(gps.date.month());
    Serial.print(F("/"));
    Serial.print(gps.date.day());
    Serial.print(F("/"));
    Serial.print(gps.date.year());
  } else {
    Serial.print(F("INVALID"));
  }

  Serial.print(F(" "));
  if (gps.time.isValid()) {
    if (gps.time.hour() < 10) Serial.print(F("0"));
    Serial.print(gps.time.hour()); Serial.print(F(":"));
    if (gps.time.minute() < 10) Serial.print(F("0"));
    Serial.print(gps.time.minute()); Serial.print(F(":"));
    if (gps.time.second() < 10) Serial.print(F("0"));
    Serial.print(gps.time.second()); Serial.print(F("."));
    if (gps.time.centisecond() < 10) Serial.print(F("0"));
    Serial.print(gps.time.centisecond());
  } else {
    Serial.print(F("INVALID"));
  }
  Serial.println();
}
After uploading the code, you can view the output in the Arduino Serial Monitor.