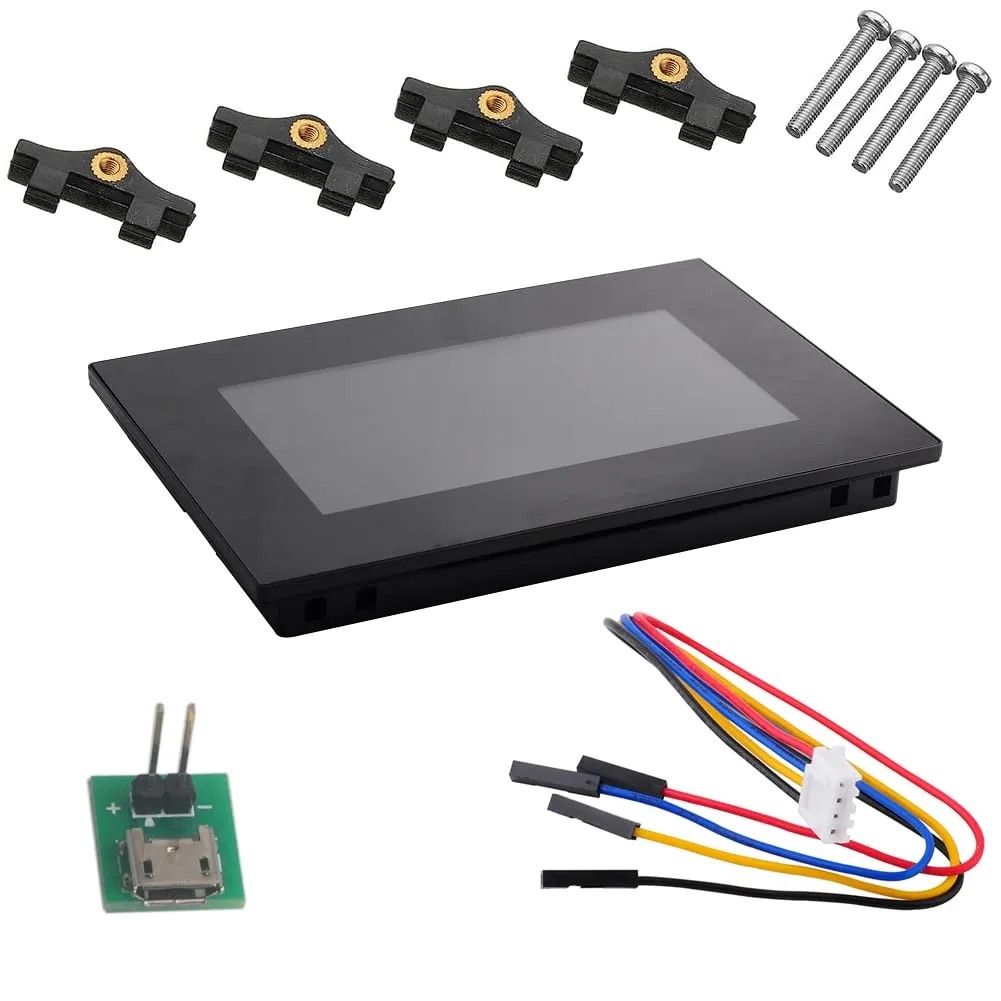
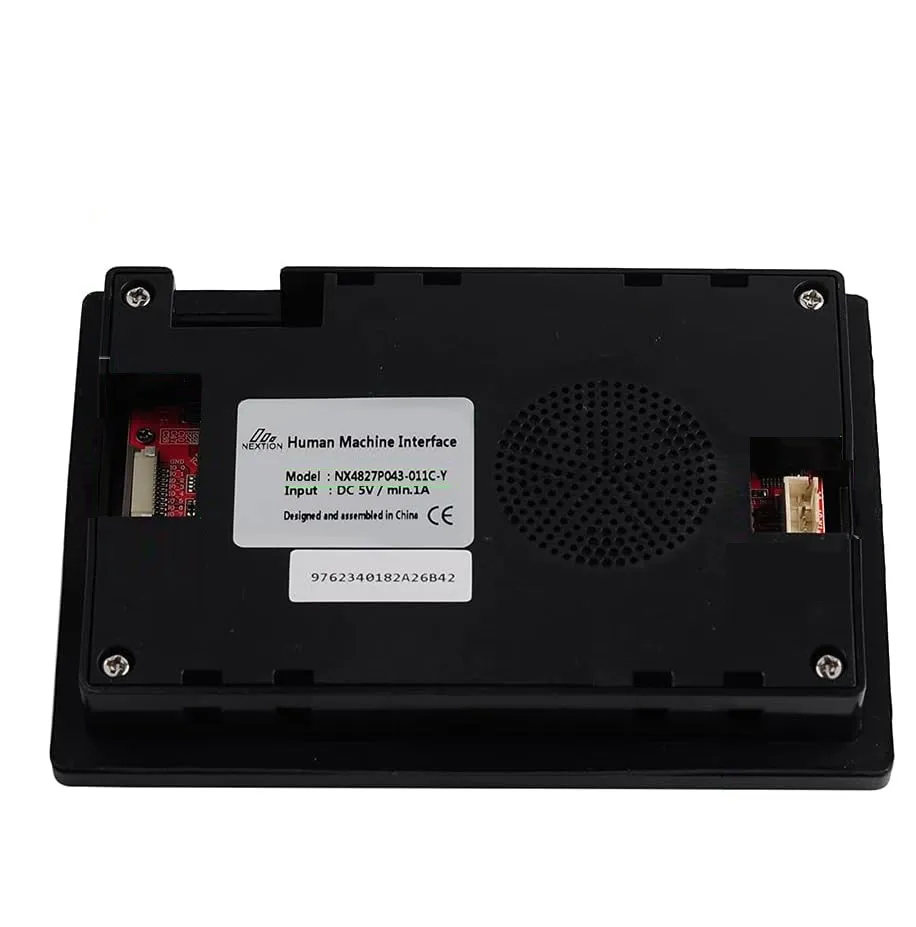
Features
- 4.3-inch intelligent HMI touchscreen display.
- 480 × 272 pixel TFT LCD resolution.
- Capacitive touch panel for responsive user interaction.
- IPS display technology with wide 178° viewing angle.
- 65K RGB color display for rich and clear graphics.
- Integrated 200MHz high-performance MCU.
- 512KB SRAM and 128MB Flash memory for complex interfaces.
- Independent processing of graphics, touch, and interface events.
- UART TTL serial communication interface.
- Compatible with Arduino, ESP32, STM32, Raspberry Pi, and other MCUs.
- Supports animations, images, icons, buttons, sliders, graphs, and custom interfaces.
- Designed using Nextion Editor drag-and-drop GUI software.
- Reduces programming complexity by handling display operations internally.
- Suitable for industrial, automation, IoT, and embedded applications.
Principle of Operation
The Nextion NX4827P043-011C-Y operates as an independent HMI controller. The onboard MCU manages all display functions including graphics rendering, touchscreen scanning, page switching, animations, and component events.

The external microcontroller communicates with the display through a UART serial connection using simple ASCII-based commands. The controller can send instructions to update text, values, images, and interface elements, while the display sends user interaction events such as button presses and touch actions back to the controller.
The user interface is created using Nextion Editor, where graphical components can be placed using a drag-and-drop system. After compiling the project, the generated TFT file is uploaded to the display using a USB-to-TTL converter or microSD card.
Applications

- Industrial machine control panels
- Smart home control interfaces
- IoT monitoring dashboards
- Robotics control systems
- 3D printer touch interfaces
- Automation equipment displays
- Laboratory and measurement instruments
- Energy monitoring systems
- Embedded GUI projects
- Educational electronics applications
- Custom control terminals
Pinout

| Pin | Function |
|---|---|
| VCC | Power Supply Input (5V) |
| GND | Ground Connection |
| TX | UART Transmit Output |
| RX | UART Receive Input |
Wiring

The Nextion NX4827P043-011C-Y connects to the main controller using a simple UART serial interface. Only four wires are required for operation: power, ground, transmit, and receive.
| Nextion Pin | Arduino UNO | ESP32 |
|---|---|---|
| VCC | 5V | 5V / VIN |
| GND | GND | GND |
| TX | Software Serial RX | GPIO RX Pin |
| RX | Software Serial TX | GPIO TX Pin |
Note: Ensure UART voltage compatibility when connecting with 3.3V controllers such as ESP32 or STM32.
Library Required
The Nextion display communicates using UART commands and does not require a dedicated display driver library. However, libraries can simplify communication and event handling.
- Nextion Arduino Library for Arduino-based projects.
- UART Serial Libraries for ESP32, STM32, and Raspberry Pi platforms.
- Custom UART Implementation using the Nextion Instruction Set for other microcontrollers.
Example Arduino Code
#include <SoftwareSerial.h>

SoftwareSerial nextion(10, 11);
// RX, TX

void setup()
{
  Serial.begin(9600);
  nextion.begin(9600);
}

void loop()
{
  // Change text component t0
  nextion.print("t0.txt=\"Hello Nextion\"");
  nextion.write(0xFF);
  nextion.write(0xFF);
  nextion.write(0xFF);

  delay(2000);
}
Uploading HMI Projects
Using USB-to-TTL Adapter

- Create the interface design using Nextion Editor.
- Compile the project and generate the TFT file.
- Connect the display using a USB-to-TTL converter.
- Upload the TFT project file to the display.
Using MicroSD Card
- Format a microSD card using FAT32 format.
- Copy the TFT file to the SD card.
- Insert the SD card into the Nextion display.
- Power on the display.
- The update process starts automatically.
- Wait until the display shows successful update.
- Remove the SD card and restart the display.
Specifications
| Product Type | Intelligent HMI Touch Display |
| Model | NX4827P043-011C-Y |
| Display Size | 4.3 Inch |
| Resolution | 480 × 272 Pixels |
| Display Technology | TFT IPS LCD |
| Color Depth | 65K RGB Colors |
| Viewing Angle | 178° Wide Viewing Angle |
| Touch Type | Capacitive Touch |
| MCU | Integrated 200MHz Processor |
| SRAM | 512KB |
| Flash Memory | 128MB |
| Communication Interface | TTL UART Serial |
| Programming Software | Nextion Editor |
| Power Supply | 5V DC |
| Project Storage | Internal Flash / microSD Update |
Resources
- Nextion Editor:
https://nextion.tech/nextion-editor/ - Nextion Instruction Set:
https://nextion.tech/instruction-set/ - Nextion Arduino Library:
https://github.com/itead/ITEADLIB_Arduino_Nextion - Nextion Official Website:
https://nextion.tech/ - Arduino IDE:
https://www.arduino.cc/en/software
Features
- 4.3-inch intelligent HMI touchscreen display.
- 480 × 272 pixel TFT LCD resolution.
- Capacitive touch panel for responsive user interaction.
- IPS display technology with wide 178° viewing angle.
- 65K RGB color display for rich and clear graphics.
- Integrated 200MHz high-performance MCU.
- 512KB SRAM and 128MB Flash memory for complex interfaces.
- Independent processing of graphics, touch, and interface events.
- UART TTL serial communication interface.
- Compatible with Arduino, ESP32, STM32, Raspberry Pi, and other MCUs.
- Supports animations, images, icons, buttons, sliders, graphs, and custom interfaces.
- Designed using Nextion Editor drag-and-drop GUI software.
- Reduces programming complexity by handling display operations internally.
- Suitable for industrial, automation, IoT, and embedded applications.
Principle of Operation
The Nextion NX4827P043-011C-Y operates as an independent HMI controller. The onboard MCU manages all display functions including graphics rendering, touchscreen scanning, page switching, animations, and component events.
The external microcontroller communicates with the display through a UART serial connection using simple ASCII-based commands. The controller can send instructions to update text, values, images, and interface elements, while the display sends user interaction events such as button presses and touch actions back to the controller.
The user interface is created using Nextion Editor, where graphical components can be placed using a drag-and-drop system. After compiling the project, the generated TFT file is uploaded to the display using a USB-to-TTL converter or microSD card.
Applications
- Industrial machine control panels
- Smart home control interfaces
- IoT monitoring dashboards
- Robotics control systems
- 3D printer touch interfaces
- Automation equipment displays
- Laboratory and measurement instruments
- Energy monitoring systems
- Embedded GUI projects
- Educational electronics applications
- Custom control terminals
Pinout
| Pin | Function |
|---|---|
| VCC | Power Supply Input (5V) |
| GND | Ground Connection |
| TX | UART Transmit Output |
| RX | UART Receive Input |
Wiring
The Nextion NX4827P043-011C-Y connects to the main controller using a simple UART serial interface. Only four wires are required for operation: power, ground, transmit, and receive.
| Nextion Pin | Arduino UNO | ESP32 |
|---|---|---|
| VCC | 5V | 5V / VIN |
| GND | GND | GND |
| TX | Software Serial RX | GPIO RX Pin |
| RX | Software Serial TX | GPIO TX Pin |
Note: Ensure UART voltage compatibility when connecting with 3.3V controllers such as ESP32 or STM32.
Library Required
The Nextion display communicates using UART commands and does not require a dedicated display driver library. However, libraries can simplify communication and event handling.
- Nextion Arduino Library for Arduino-based projects.
- UART Serial Libraries for ESP32, STM32, and Raspberry Pi platforms.
- Custom UART Implementation using the Nextion Instruction Set for other microcontrollers.
Example Arduino Code
#include <SoftwareSerial.h>

SoftwareSerial nextion(10, 11);
// RX, TX

void setup()
{
  Serial.begin(9600);
  nextion.begin(9600);
}

void loop()
{
  // Change text component t0
  nextion.print("t0.txt=\"Hello Nextion\"");
  nextion.write(0xFF);
  nextion.write(0xFF);
  nextion.write(0xFF);

  delay(2000);
}
Uploading HMI Projects
Using USB-to-TTL Adapter
- Create the interface design using Nextion Editor.
- Compile the project and generate the TFT file.
- Connect the display using a USB-to-TTL converter.
- Upload the TFT project file to the display.
Using MicroSD Card
- Format a microSD card using FAT32 format.
- Copy the TFT file to the SD card.
- Insert the SD card into the Nextion display.
- Power on the display.
- The update process starts automatically.
- Wait until the display shows successful update.
- Remove the SD card and restart the display.
Specifications
| Product Type | Intelligent HMI Touch Display |
| Model | NX4827P043-011C-Y |
| Display Size | 4.3 Inch |
| Resolution | 480 × 272 Pixels |
| Display Technology | TFT IPS LCD |
| Color Depth | 65K RGB Colors |
| Viewing Angle | 178° Wide Viewing Angle |
| Touch Type | Capacitive Touch |
| MCU | Integrated 200MHz Processor |
| SRAM | 512KB |
| Flash Memory | 128MB |
| Communication Interface | TTL UART Serial |
| Programming Software | Nextion Editor |
| Power Supply | 5V DC |
| Project Storage | Internal Flash / microSD Update |
Resources
- Nextion Editor:
https://nextion.tech/nextion-editor/ - Nextion Instruction Set:
https://nextion.tech/instruction-set/ - Nextion Arduino Library:
https://github.com/itead/ITEADLIB_Arduino_Nextion - Nextion Official Website:
https://nextion.tech/ - Arduino IDE:
https://www.arduino.cc/en/software