
Features:
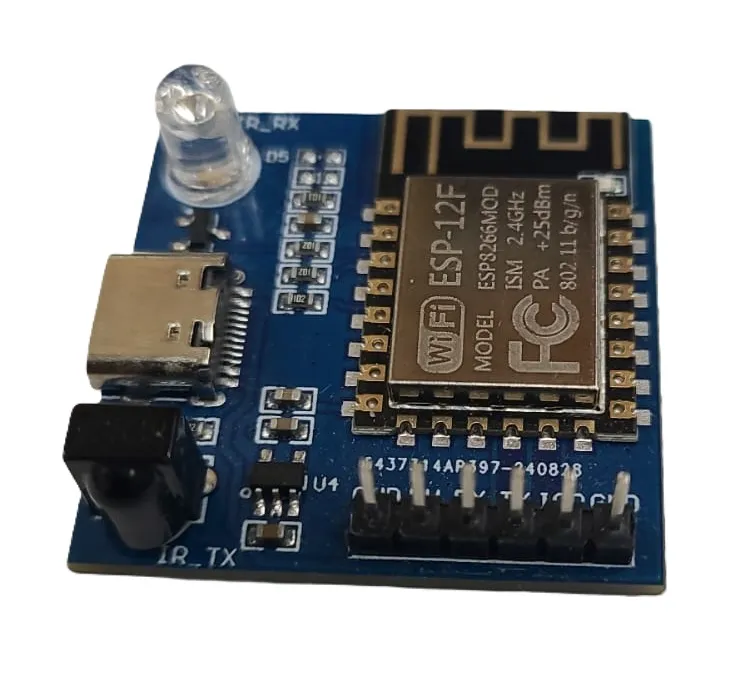
- Based on ESP8266 ESP-12F WiFi module.
- Supports NEC infrared command transmission and reception.
- Web-based WiFi configuration for easy setup.
- Wireless UDP signal forwarding functionality.
- Infrared transmission and reception range up to approximately 5 meters.
- Compact and lightweight design.
- Supports secondary firmware development.
- Integrated Type-C USB interface.
- Low power WiFi solution for IoT projects.
- Supports 802.11b/g/n WiFi standards.
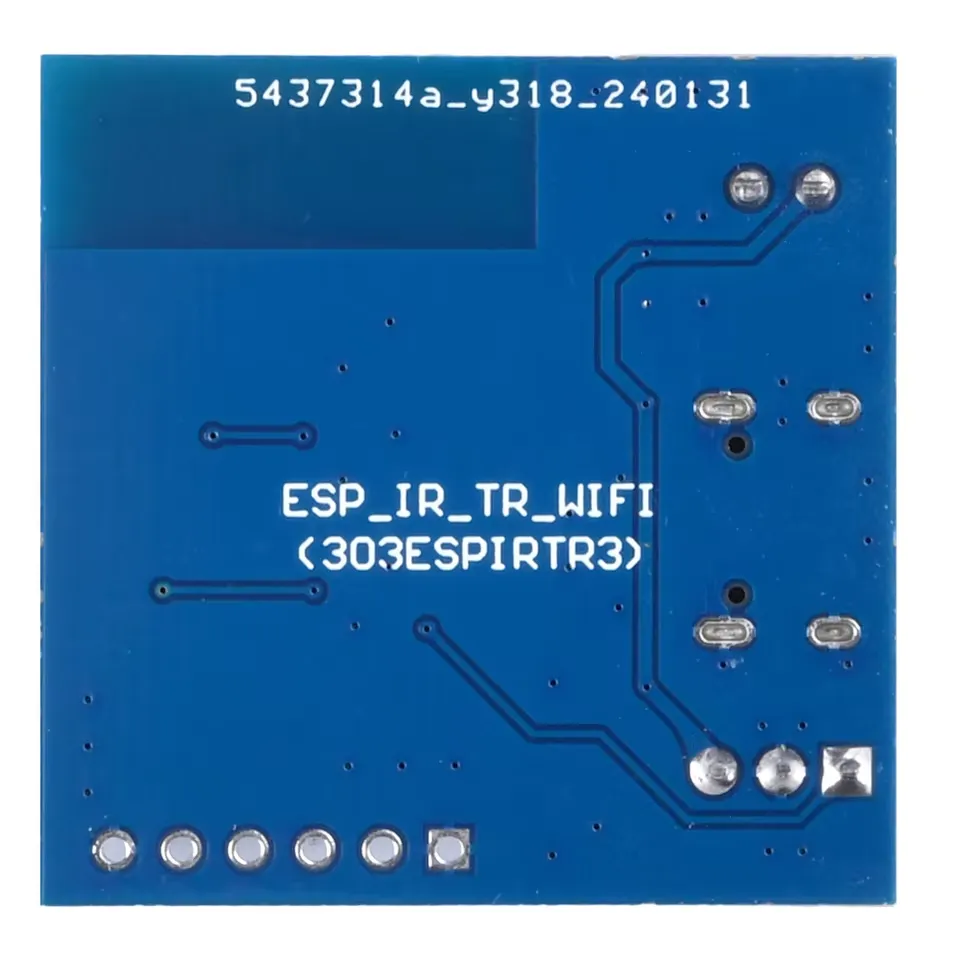
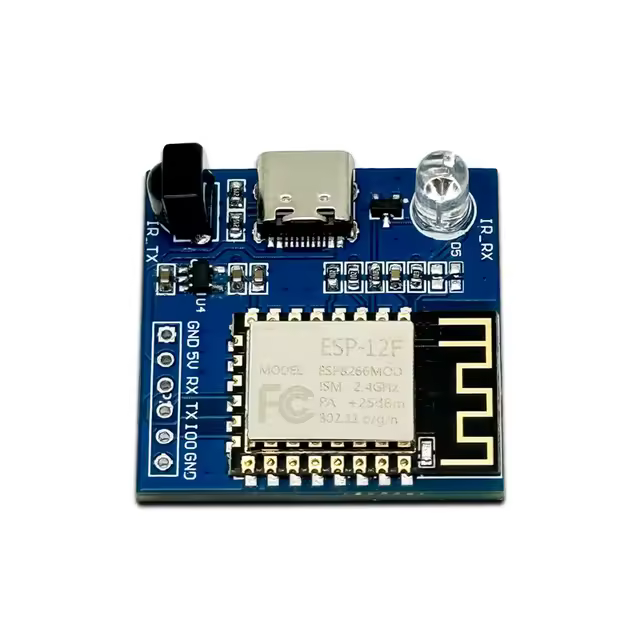
Pinout of the Module:
| Pin | Function |
|---|---|
| 5V | Power Supply Input |
| GND | Ground |
| TX | UART Transmit |
| RX | UART Receive |
| IR TX | Infrared Transmission |
| IR RX | Infrared Reception |
Principle of Work:
The module combines infrared communication with wireless WiFi networking to relay remote-control commands between devices.
- Infrared Reception: Captures NEC-format IR remote signals.
- Signal Processing: The ESP8266 decodes and processes received IR commands.
- WiFi Communication: Commands are transmitted via UDP over WiFi.
- Infrared Transmission: Another module can retransmit the received IR command remotely.
- Web Configuration: Built-in web interface allows easy WiFi setup.
How to Start with the Module:
To program the ESP8266 NEC WiFi Transmission Module, follow these steps carefully:
- Connect a USB-to-UART adapter to the module:
- GND → GND
- 5V → 5V
- RX → TX
- TX → RX
- Connect GPIO0 to GND to place the ESP8266 into flashing mode.
- Plug the USB-to-UART adapter into your computer.
- Open Arduino IDE or ESPHome and select the correct ESP8266 board and COM port.
- Upload your firmware or configuration.
- After programming is complete, disconnect GPIO0 from GND and restart the module for normal operation.
How to Install ESP8266 Boards in Arduino IDE:
- Open Arduino IDE.
- Go to File > Preferences.
- In "Additional Boards Manager URLs", add:
http://arduino.esp8266.com/stable/package_esp8266com_index.json
- Click OK.
- Go to Tools > Board > Boards Manager.
- Search for ESP8266.
- Install ESP8266 by ESP8266 Community.
- Wait for installation to complete.
ESPHome Configuration Example:
esp8266:
  board: esp01_1m

remote_receiver:
  pin:
    number: gpio14
    inverted: true
  dump: all

remote_transmitter:
  - id: ir
    carrier_duty_percent: 50%
    pin: gpio4
This configuration enables the module to receive and transmit infrared NEC signals using ESPHome. GPIO14 is used as the infrared receiver input, while GPIO4 is configured as the infrared transmitter output with a 50% carrier duty cycle.
Code:
Basic ESP8266 WiFi Connection Example:
#include <ESP8266WiFi.h>

const char* ssid = "YOUR_WIFI_NAME";
const char* password = "YOUR_WIFI_PASSWORD";

void setup() {
  Serial.begin(115200);

  WiFi.begin(ssid, password);

  Serial.print("Connecting");

  while (WiFi.status() != WL_CONNECTED) {
    delay(500);
    Serial.print(".");
  }

  Serial.println("");
  Serial.println("WiFi Connected");
  Serial.print("IP Address: ");
  Serial.println(WiFi.localIP());
}

void loop() {

}
Applications:
- Smart home infrared control systems.
- Wireless remote-control signal forwarding.
- IR repeater systems.
- Home automation projects.
- IoT wireless communication applications.
Technical Details:
- Module Type: ESP8266 (ESP-12F)
- USB Interface: Type-C
- Operating Voltage: 5V
- WiFi Protocol: 802.11b/g/n
- Infrared Frequency: 38KHz
- Infrared Range: Approximately 5 meters
- Dimensions: 33mm x 33mm
- Communication Protocol: UDP
- Configuration Method: Web-based setup
Features:
- Based on ESP8266 ESP-12F WiFi module.
- Supports NEC infrared command transmission and reception.
- Web-based WiFi configuration for easy setup.
- Wireless UDP signal forwarding functionality.
- Infrared transmission and reception range up to approximately 5 meters.
- Compact and lightweight design.
- Supports secondary firmware development.
- Integrated Type-C USB interface.
- Low power WiFi solution for IoT projects.
- Supports 802.11b/g/n WiFi standards.
Pinout of the Module:
| Pin | Function |
|---|---|
| 5V | Power Supply Input |
| GND | Ground |
| TX | UART Transmit |
| RX | UART Receive |
| IR TX | Infrared Transmission |
| IR RX | Infrared Reception |
Principle of Work:
The module combines infrared communication with wireless WiFi networking to relay remote-control commands between devices.
- Infrared Reception: Captures NEC-format IR remote signals.
- Signal Processing: The ESP8266 decodes and processes received IR commands.
- WiFi Communication: Commands are transmitted via UDP over WiFi.
- Infrared Transmission: Another module can retransmit the received IR command remotely.
- Web Configuration: Built-in web interface allows easy WiFi setup.
How to Start with the Module:
To program the ESP8266 NEC WiFi Transmission Module, follow these steps carefully:
- Connect a USB-to-UART adapter to the module:
- GND → GND
- 5V → 5V
- RX → TX
- TX → RX
- Connect GPIO0 to GND to place the ESP8266 into flashing mode.
- Plug the USB-to-UART adapter into your computer.
- Open Arduino IDE or ESPHome and select the correct ESP8266 board and COM port.
- Upload your firmware or configuration.
- After programming is complete, disconnect GPIO0 from GND and restart the module for normal operation.
How to Install ESP8266 Boards in Arduino IDE:
- Open Arduino IDE.
- Go to File > Preferences.
- In "Additional Boards Manager URLs", add:
http://arduino.esp8266.com/stable/package_esp8266com_index.json
- Click OK.
- Go to Tools > Board > Boards Manager.
- Search for ESP8266.
- Install ESP8266 by ESP8266 Community.
- Wait for installation to complete.
ESPHome Configuration Example:
esp8266:
  board: esp01_1m

remote_receiver:
  pin:
    number: gpio14
    inverted: true
  dump: all

remote_transmitter:
  - id: ir
    carrier_duty_percent: 50%
    pin: gpio4
This configuration enables the module to receive and transmit infrared NEC signals using ESPHome. GPIO14 is used as the infrared receiver input, while GPIO4 is configured as the infrared transmitter output with a 50% carrier duty cycle.
Code:
Basic ESP8266 WiFi Connection Example:
#include <ESP8266WiFi.h>

const char* ssid = "YOUR_WIFI_NAME";
const char* password = "YOUR_WIFI_PASSWORD";

void setup() {
  Serial.begin(115200);

  WiFi.begin(ssid, password);

  Serial.print("Connecting");

  while (WiFi.status() != WL_CONNECTED) {
    delay(500);
    Serial.print(".");
  }

  Serial.println("");
  Serial.println("WiFi Connected");
  Serial.print("IP Address: ");
  Serial.println(WiFi.localIP());
}

void loop() {

}
Applications:
- Smart home infrared control systems.
- Wireless remote-control signal forwarding.
- IR repeater systems.
- Home automation projects.
- IoT wireless communication applications.
Technical Details:
- Module Type: ESP8266 (ESP-12F)
- USB Interface: Type-C
- Operating Voltage: 5V
- WiFi Protocol: 802.11b/g/n
- Infrared Frequency: 38KHz
- Infrared Range: Approximately 5 meters
- Dimensions: 33mm x 33mm
- Communication Protocol: UDP
- Configuration Method: Web-based setup