Features
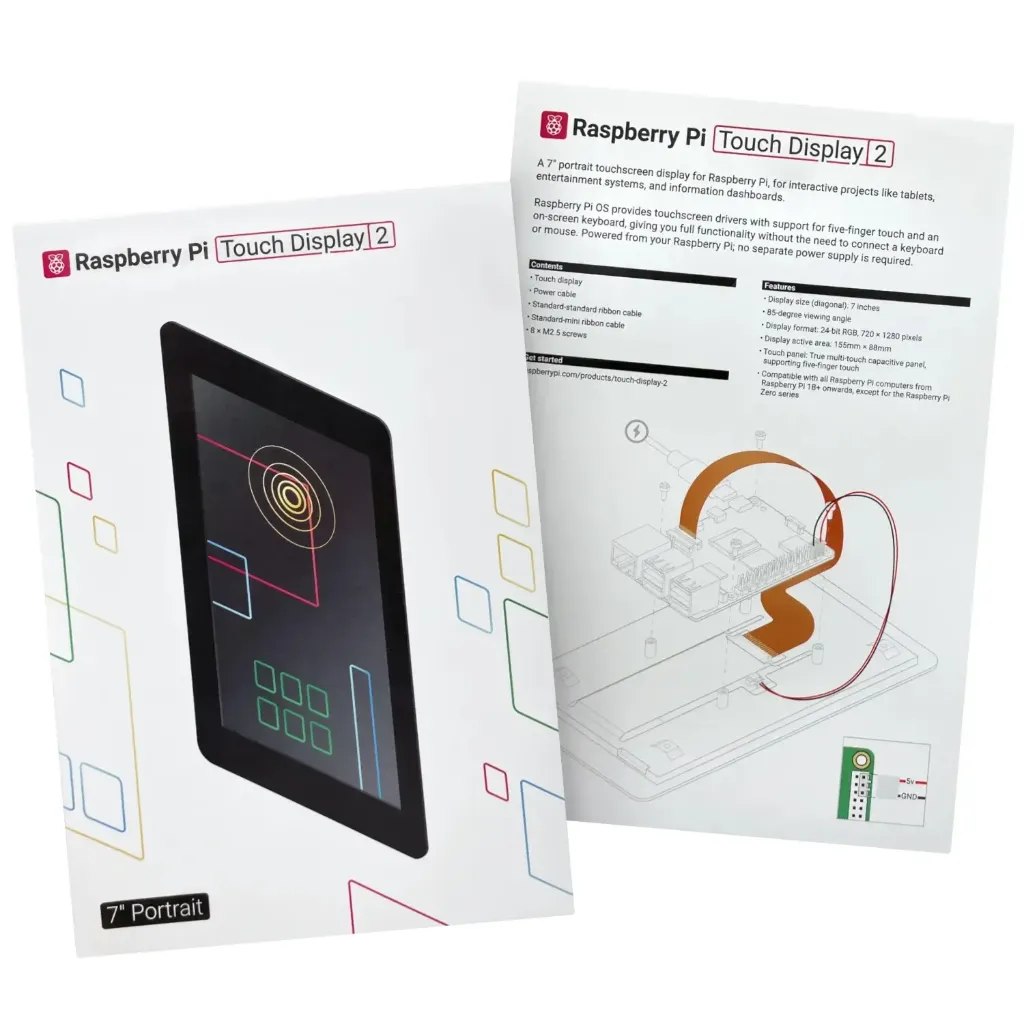
- Official Raspberry Pi touchscreen display solution.
- 7-inch TFT LCD with 24-bit RGB color output.
- High-resolution 720 × 1280 pixel display.
- Capacitive touchscreen with 5-point multi-touch support.
- Anti-reflective surface for improved visibility in bright environments.
- Normally black transmissive LCD technology for enhanced contrast.
- Native Raspberry Pi OS support with built-in drivers.
- Connects through high-speed DSI interface.
- Powered directly from Raspberry Pi GPIO pins.
- Supports on-screen keyboard operation without external input devices.
- Suitable for custom user interfaces and GUI applications.
- Compact design for embedded and portable systems.
Principle of Operation
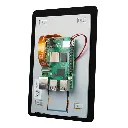
The Raspberry Pi Touch Display 2 combines a TFT LCD display panel with an integrated capacitive touch sensing layer. Video data is transferred from the Raspberry Pi through the DSI interface, allowing high-speed communication and smooth rendering of graphics, images, and user interfaces.
The capacitive touchscreen detects changes in the electrical field caused by finger contact. The touch controller processes these signals and sends touch coordinates back to the Raspberry Pi, enabling interactive functions such as tapping, swiping, and multi-touch gestures.
The display receives power directly from the Raspberry Pi GPIO connection, eliminating the need for an external power adapter. Raspberry Pi OS includes the required drivers, allowing the screen to function as both a display output and a touch input device immediately after connection.
Applications
- Raspberry Pi tablets and portable computers
- Smart home control panels
- IoT monitoring dashboards
- Interactive kiosks
- Industrial monitoring interfaces
- Machine control panels
- Media center controllers
- Home automation systems
- Educational Raspberry Pi projects
- Embedded GUI development
- Digital information displays
Pinout
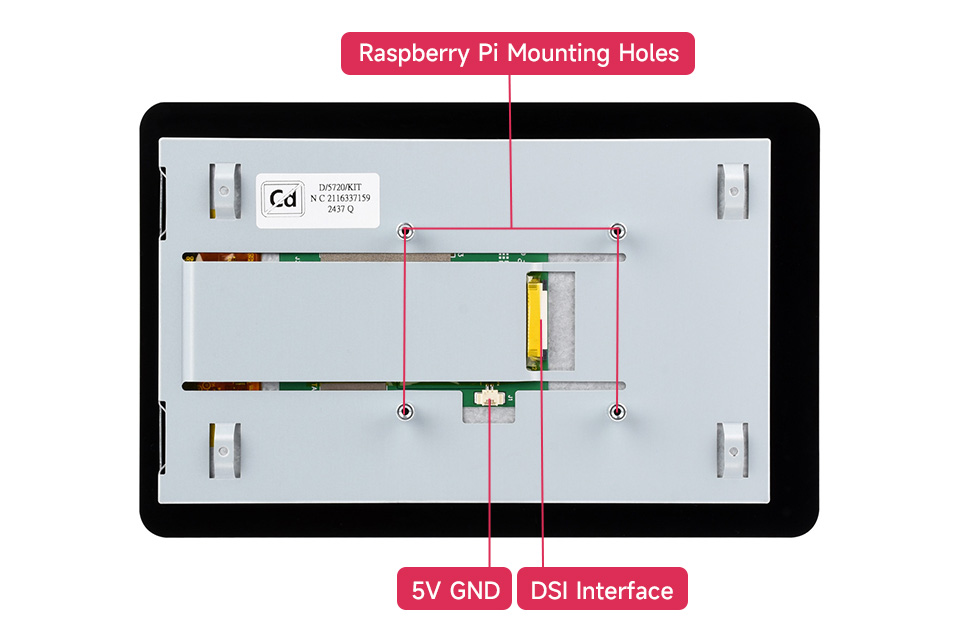
| Connection | Function |
|---|---|
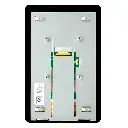
| DSI Connector | Transfers display data between the Raspberry Pi and the screen |
| Power pins | To deliver power |
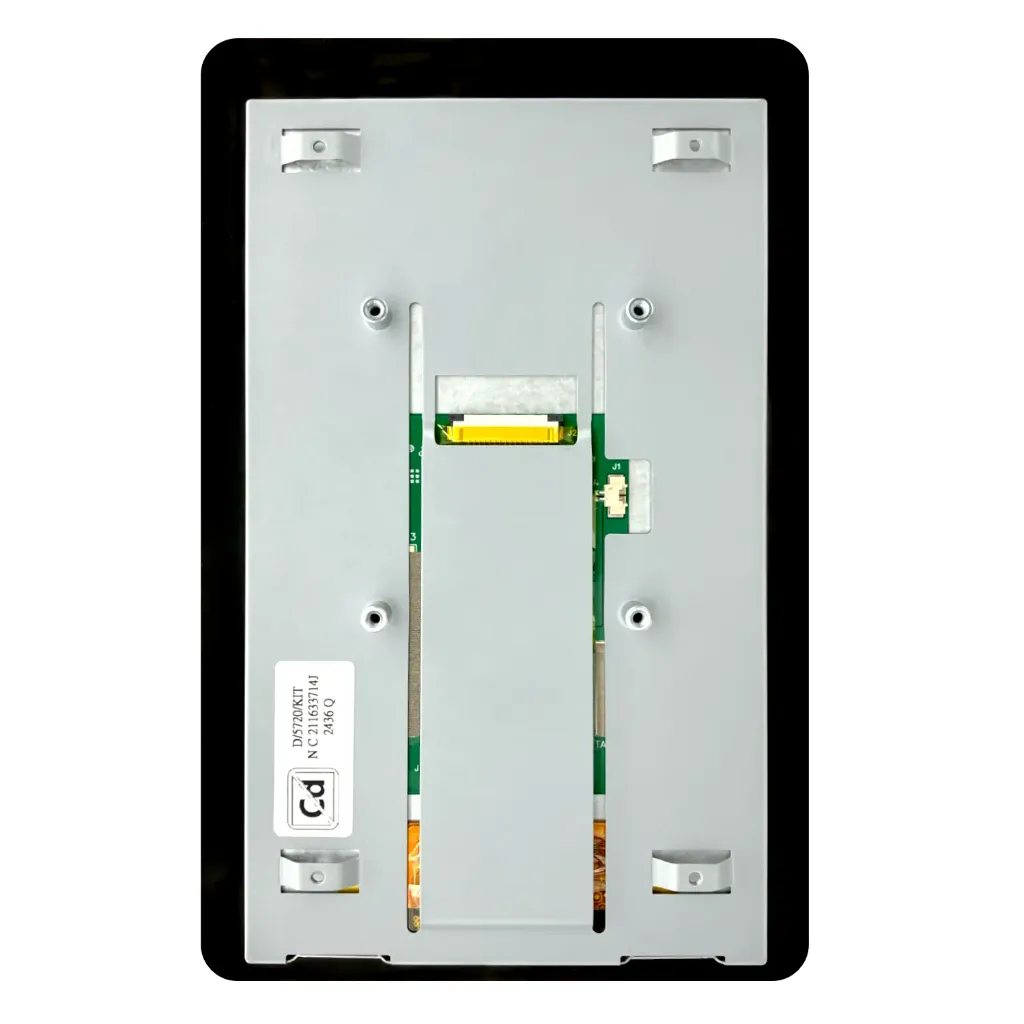
| Mounting Points | Mechanical attachment to Raspberry Pi cases or enclosures |
Wiring

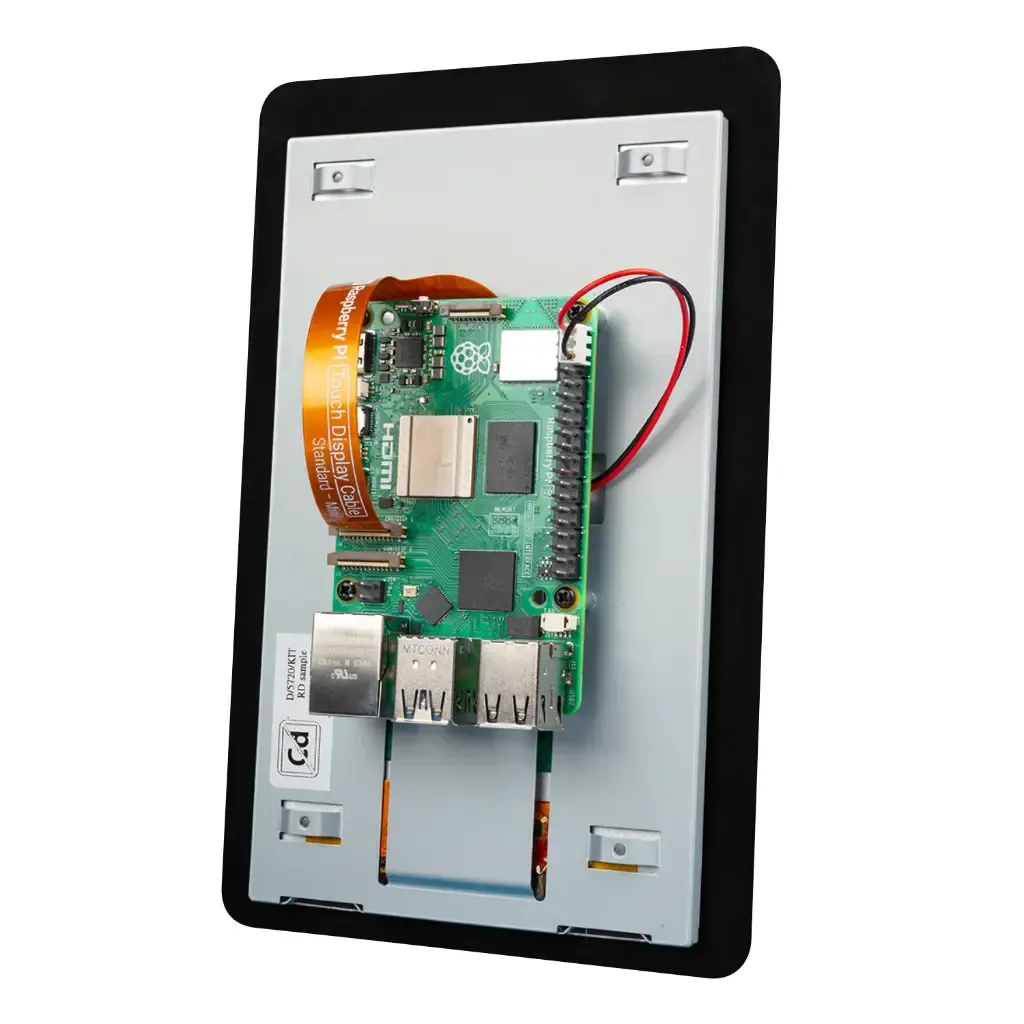
The Raspberry Pi Touch Display 2 requires only two connections: the DSI ribbon cable for display communication and the GPIO power cable for supplying power. No HDMI cable or additional drivers are required.
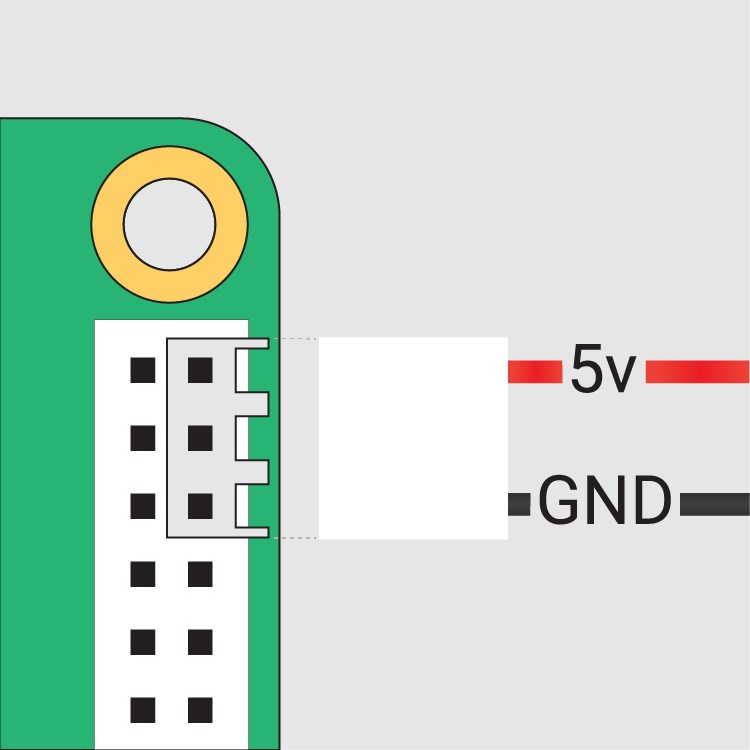
| Display Connection | Raspberry Pi Connection |
|---|---|
| DSI Ribbon Cable | Raspberry Pi DSI Display Connector |
| GPIO Power Cable | Raspberry Pi GPIO Header |
Raspberry Pi Touch Display 2 Setup Guide
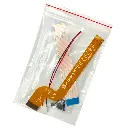
The Raspberry Pi Touch Display 2 connects to the Raspberry Pi using a Flat Flexible Cable (FFC) for the display signal and a GPIO connector cable for power.
Required Cable
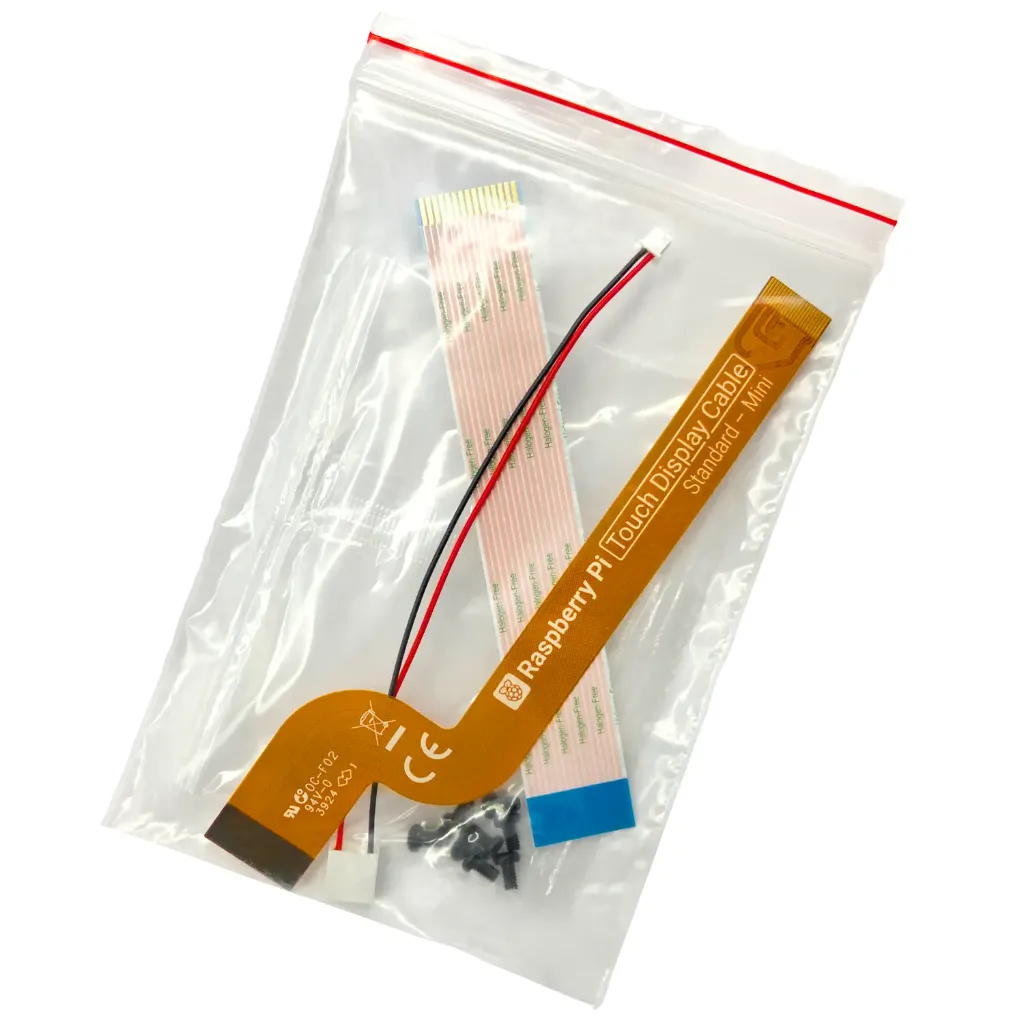
- Raspberry Pi 5: Use the included 22-way to 15-way FFC cable.
- Other Raspberry Pi models: Use the included 15-way to 15-way FFC cable.
Connection Steps
Before connecting, disconnect power from the Raspberry Pi. Insert the FFC cable into the Touch Display 2 connector with the metal contacts facing upwards, then secure the connector clips.
Connect the other end of the FFC cable to the Raspberry Pi DSI display connector. On Raspberry Pi boards with multiple DSI ports, use the port marked DISPLAY 1 when available.
Connect the GPIO power cable to the Touch Display 2 port marked J1. Connect the other end to the Raspberry Pi GPIO pins:
- Pin 2: 5V Power (Red wire)
- Pin 6: Ground (Black wire)
After all connections are complete, reconnect power. The display may take up to one minute to initialize.
Using the On-Screen Keyboard
Raspberry Pi OS Bookworm and newer versions include the Squeekboard on-screen keyboard. When a touch display is connected, the keyboard appears automatically when text input is required.
The keyboard can also be manually controlled from the keyboard icon on the taskbar or configured through:
- Raspberry Pi Configuration → Display
- raspi-config → Display settings
Changing Screen Orientation
To rotate the display in Raspberry Pi OS with a desktop environment:
- Open Preferences → Screen Configuration
- Right-click the display
- Select Orientation
- Choose the required rotation angle
For systems without a desktop environment, edit:
/boot/firmware/cmdline.txtAdd the following line at the end:
video=DSI-1:720x1280@60,rotate=<rotation-value>Replace <rotation-value> with:
- 0 - Normal orientation
- 90 - Rotate clockwise 90°
- 180 - Upside down
- 270 - Rotate clockwise 270°
Specifications
| Product Type | Raspberry Pi Touchscreen Display |
| Display Size | 7 Inches |
| Resolution | 720 × 1280 Pixels |
| Display Technology | TFT LCD |
| Color Format | 24-bit RGB |
| Touch Technology | Capacitive Multi-Touch |
| Touch Support | Up to 5 Simultaneous Touch Points |
| Active Area | 154.56 × 86.94 mm |
| Interface | DSI (Display Serial Interface) |
| Surface | Anti-Reflective Coating |
| Power Input | Raspberry Pi GPIO |
| Operating System Support | Raspberry Pi OS |
Software Libraries and Frameworks for Raspberry Pi Touch Display 2
Raspberry Pi OS fully supports the Raspberry Pi Touch Display 2 and does not require any additional display drivers or libraries. The operating system automatically handles display output and touchscreen input through the built-in support.
For developing touchscreen applications, different graphical frameworks can be used depending on the project requirements:
- GTK – Used for creating desktop-style graphical user interfaces.
- Qt – Suitable for embedded systems, industrial interfaces, and advanced GUI applications.
- Kivy – A Python framework designed for touch-based applications and interactive user interfaces.
- Tkinter – A simple Python GUI library suitable for basic control panels and small applications.
- Pygame – Used for interactive graphics, animations, and multimedia projects.
Example Python Code
from tkinter import *

root = Tk()

root.title("Raspberry Pi Touch Display")

label = Label(
    root,
    text="Hello Raspberry Pi Touchscreen",
    font=("Arial", 24)
)

label.pack(expand=True)

root.mainloop()
Resources
- Raspberry Pi OS Download
- Installation Guide
- Raspberry Pi Touch Display 2 Documentation
- Python Tkinter Documentation
- Kivy Documentation
- Qt Framework
Features
- Official Raspberry Pi touchscreen display solution.
- 7-inch TFT LCD with 24-bit RGB color output.
- High-resolution 720 × 1280 pixel display.
- Capacitive touchscreen with 5-point multi-touch support.
- Anti-reflective surface for improved visibility in bright environments.
- Normally black transmissive LCD technology for enhanced contrast.
- Native Raspberry Pi OS support with built-in drivers.
- Connects through high-speed DSI interface.
- Powered directly from Raspberry Pi GPIO pins.
- Supports on-screen keyboard operation without external input devices.
- Suitable for custom user interfaces and GUI applications.
- Compact design for embedded and portable systems.
Principle of Operation
The Raspberry Pi Touch Display 2 combines a TFT LCD display panel with an integrated capacitive touch sensing layer. Video data is transferred from the Raspberry Pi through the DSI interface, allowing high-speed communication and smooth rendering of graphics, images, and user interfaces.
The capacitive touchscreen detects changes in the electrical field caused by finger contact. The touch controller processes these signals and sends touch coordinates back to the Raspberry Pi, enabling interactive functions such as tapping, swiping, and multi-touch gestures.
The display receives power directly from the Raspberry Pi GPIO connection, eliminating the need for an external power adapter. Raspberry Pi OS includes the required drivers, allowing the screen to function as both a display output and a touch input device immediately after connection.
Applications
- Raspberry Pi tablets and portable computers
- Smart home control panels
- IoT monitoring dashboards
- Interactive kiosks
- Industrial monitoring interfaces
- Machine control panels
- Media center controllers
- Home automation systems
- Educational Raspberry Pi projects
- Embedded GUI development
- Digital information displays
Pinout
| Connection | Function |
|---|---|
| DSI Connector | Transfers display data between the Raspberry Pi and the screen |
| Power pins | To deliver power |
| Mounting Points | Mechanical attachment to Raspberry Pi cases or enclosures |
Wiring
The Raspberry Pi Touch Display 2 requires only two connections: the DSI ribbon cable for display communication and the GPIO power cable for supplying power. No HDMI cable or additional drivers are required.
| Display Connection | Raspberry Pi Connection |
|---|---|
| DSI Ribbon Cable | Raspberry Pi DSI Display Connector |
| GPIO Power Cable | Raspberry Pi GPIO Header |
Raspberry Pi Touch Display 2 Setup Guide
The Raspberry Pi Touch Display 2 connects to the Raspberry Pi using a Flat Flexible Cable (FFC) for the display signal and a GPIO connector cable for power.
Required Cable
- Raspberry Pi 5: Use the included 22-way to 15-way FFC cable.
- Other Raspberry Pi models: Use the included 15-way to 15-way FFC cable.
Connection Steps
Before connecting, disconnect power from the Raspberry Pi. Insert the FFC cable into the Touch Display 2 connector with the metal contacts facing upwards, then secure the connector clips.
Connect the other end of the FFC cable to the Raspberry Pi DSI display connector. On Raspberry Pi boards with multiple DSI ports, use the port marked DISPLAY 1 when available.
Connect the GPIO power cable to the Touch Display 2 port marked J1. Connect the other end to the Raspberry Pi GPIO pins:
- Pin 2: 5V Power (Red wire)
- Pin 6: Ground (Black wire)
After all connections are complete, reconnect power. The display may take up to one minute to initialize.
Using the On-Screen Keyboard
Raspberry Pi OS Bookworm and newer versions include the Squeekboard on-screen keyboard. When a touch display is connected, the keyboard appears automatically when text input is required.
The keyboard can also be manually controlled from the keyboard icon on the taskbar or configured through:
- Raspberry Pi Configuration → Display
- raspi-config → Display settings
Changing Screen Orientation
To rotate the display in Raspberry Pi OS with a desktop environment:
- Open Preferences → Screen Configuration
- Right-click the display
- Select Orientation
- Choose the required rotation angle
For systems without a desktop environment, edit:
/boot/firmware/cmdline.txtAdd the following line at the end:
video=DSI-1:720x1280@60,rotate=<rotation-value>Replace <rotation-value> with:
- 0 - Normal orientation
- 90 - Rotate clockwise 90°
- 180 - Upside down
- 270 - Rotate clockwise 270°
Specifications
| Product Type | Raspberry Pi Touchscreen Display |
| Display Size | 7 Inches |
| Resolution | 720 × 1280 Pixels |
| Display Technology | TFT LCD |
| Color Format | 24-bit RGB |
| Touch Technology | Capacitive Multi-Touch |
| Touch Support | Up to 5 Simultaneous Touch Points |
| Active Area | 154.56 × 86.94 mm |
| Interface | DSI (Display Serial Interface) |
| Surface | Anti-Reflective Coating |
| Power Input | Raspberry Pi GPIO |
| Operating System Support | Raspberry Pi OS |
Software Libraries and Frameworks for Raspberry Pi Touch Display 2
Raspberry Pi OS fully supports the Raspberry Pi Touch Display 2 and does not require any additional display drivers or libraries. The operating system automatically handles display output and touchscreen input through the built-in support.
For developing touchscreen applications, different graphical frameworks can be used depending on the project requirements:
- GTK – Used for creating desktop-style graphical user interfaces.
- Qt – Suitable for embedded systems, industrial interfaces, and advanced GUI applications.
- Kivy – A Python framework designed for touch-based applications and interactive user interfaces.
- Tkinter – A simple Python GUI library suitable for basic control panels and small applications.
- Pygame – Used for interactive graphics, animations, and multimedia projects.
Example Python Code
from tkinter import *

root = Tk()

root.title("Raspberry Pi Touch Display")

label = Label(
    root,
    text="Hello Raspberry Pi Touchscreen",
    font=("Arial", 24)
)

label.pack(expand=True)

root.mainloop()
Resources
- Raspberry Pi OS Download
- Installation Guide
- Raspberry Pi Touch Display 2 Documentation
- Python Tkinter Documentation
- Kivy Documentation
- Qt Framework